

 Italiano
 Português
 Deutsch
 Српски језик
 Eesti
EestiCourse interface
Edit course menu
- Adding menu overrides
- Changing menu headings
Insert course content
- Overview: Build Content / Insert Content
- Item / Element
- File / file
- Multimedia files (audio, graphics, video)
- Web link
- Other content element
Copy course content
Insert video recordings
- Embed video directly as element via embed link
- Embed video as file (MP4)
- Insert video with download button
Student Preview & Edit Mode
- Edit Mode
- Student Preview (classic course view / original view)
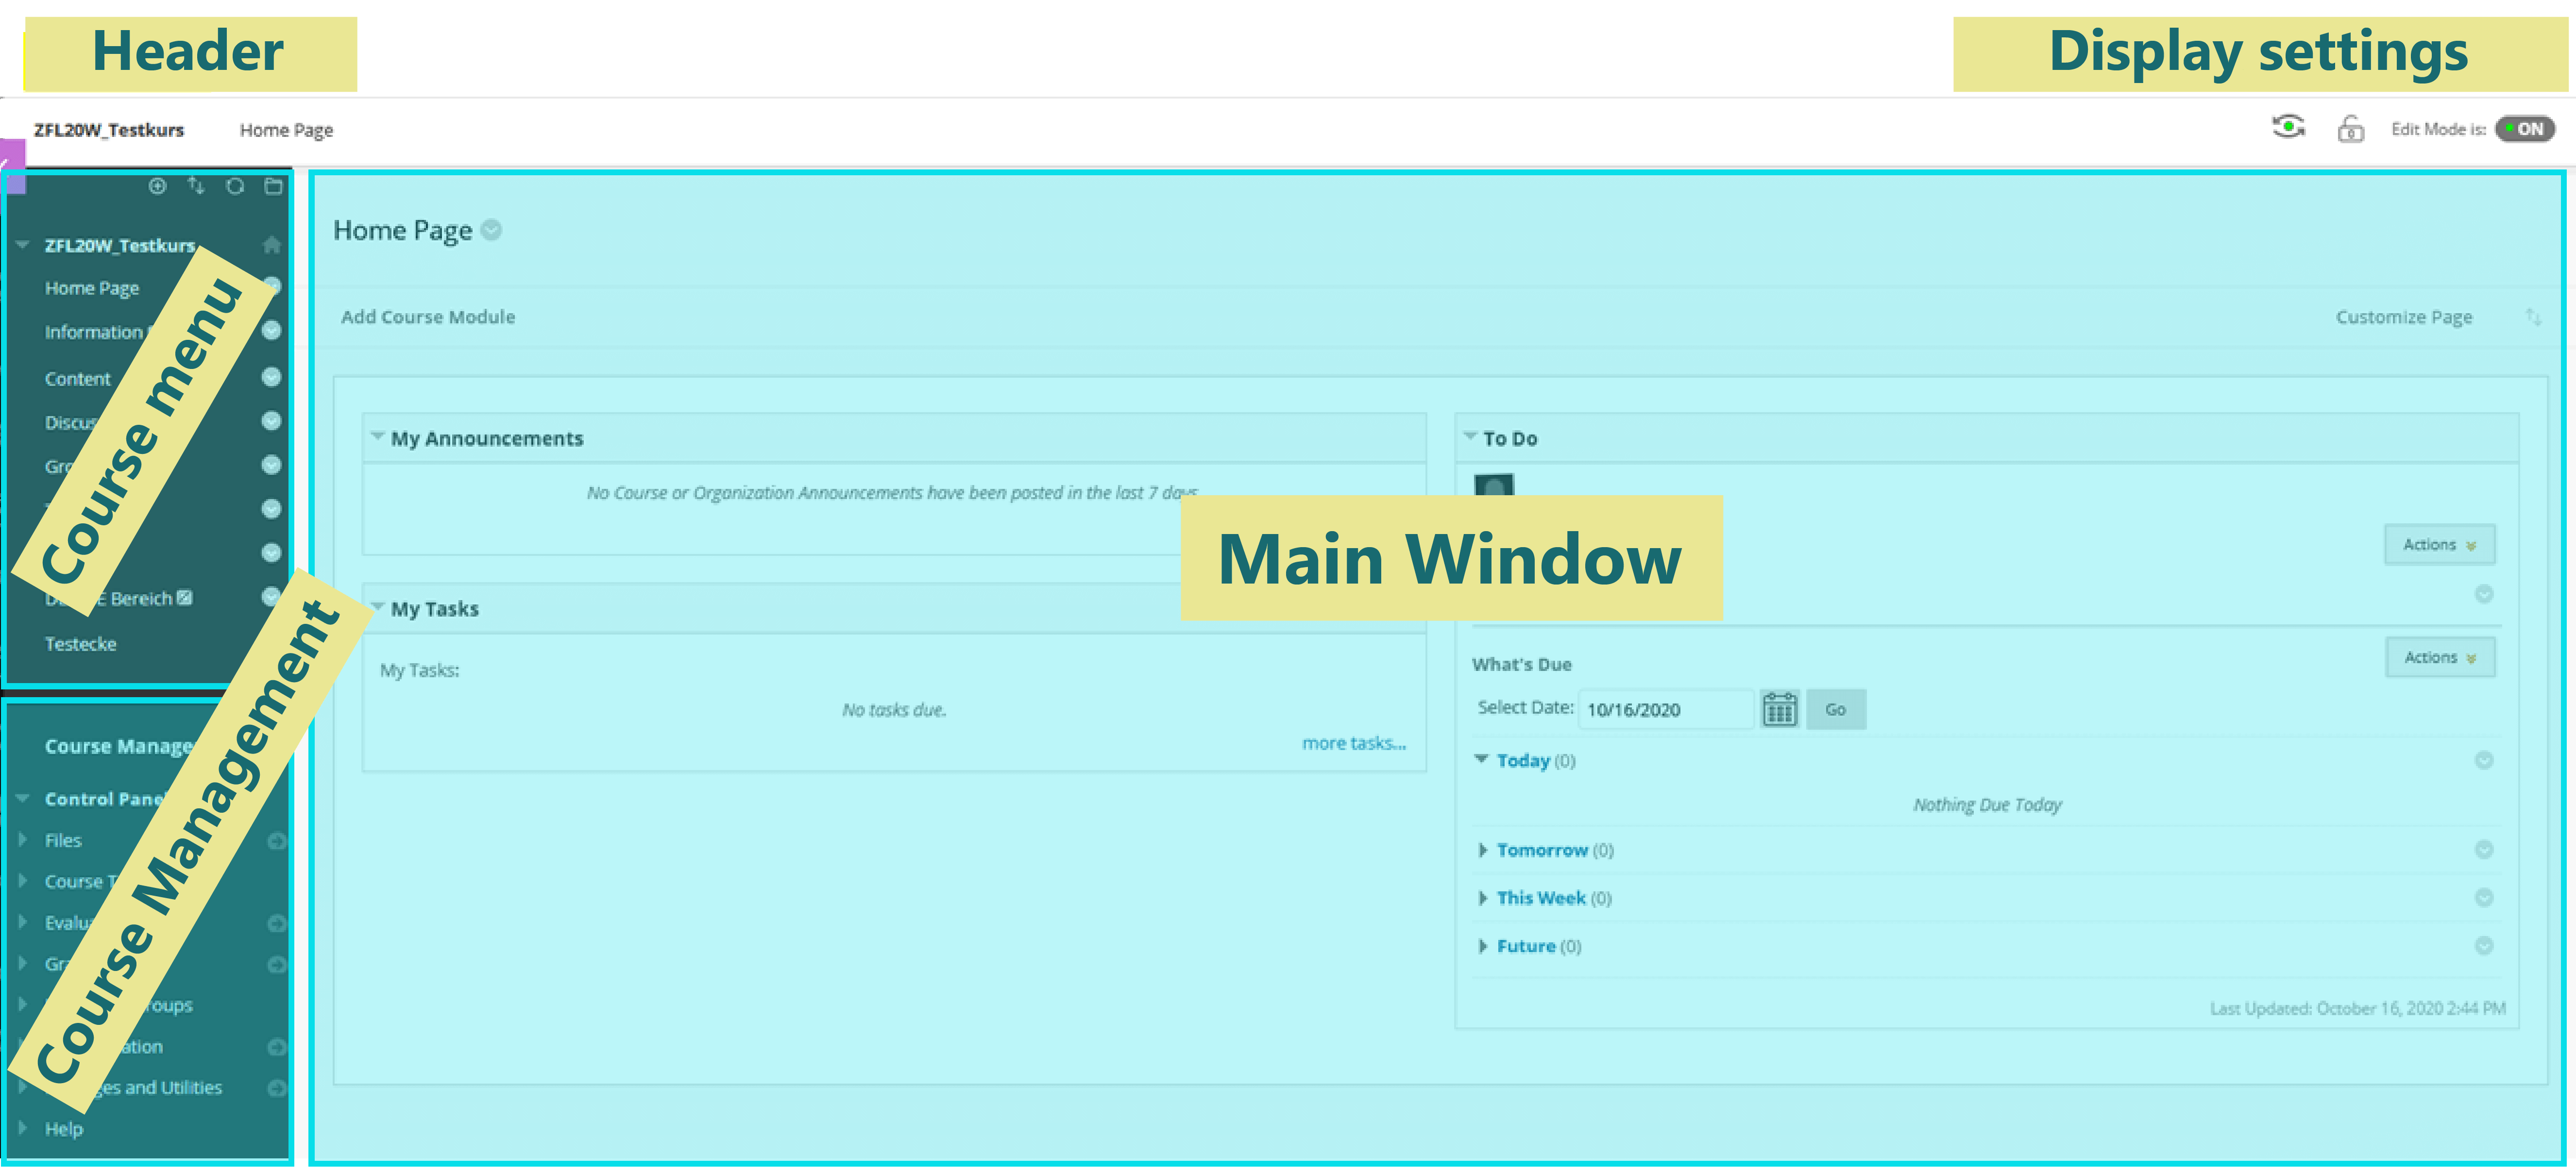
Course interface
When you enter a Blackboard course, you will find the following sections that break down the course interface.
Header
The header displays the course title and display of the current page.
Display settings
(not visible for students)
These settings include:
- Student Preview - Participant Preview
- Hide / Show Course - Switch course available/private
- Edit Mode / Edit Mode
Course menu
By default, content can be provided in the course menu areas - Information or Content/Content. Arbitrary menu areas can be added. Furthermore, it is possible to additionally map the course structure in folders or module pages. In the content areas you can choose between: BuildContent /Create Content, Assessments / Tests and Tool.
Here you can find the Design Menu:
- Show/hide, rename menu items
- Add menu items (e.g. tool link for Webex integration)
Course Management
(not visible for students)
In this section you can find access to:
- Course Tools
- Grade Center / Notencenter: Retrieve and evaluate performance
- Groups / Groups: Group function
- Customization: Options for course design
- Packages & Utilities: Copy course content
Main window
Course interface
Edit course menu
Advantage: In the menu area you can give your Blackboard course a superordinate structure. This structuring can be continued and refined in the individual course content pages.
The menu areas created here and filled with content are accessible to students, i.e. you can make content available to students here (also tool links such as Webex or assignments and tests!). Instruction refers to course interface in classic view / original view.
Adding menu overrides
Move the cursor to the plus symbol. A small window appears in which you can select what you want to add:
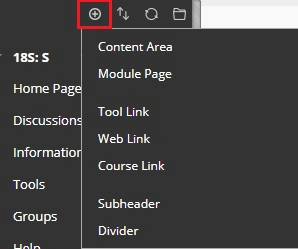
Content Area: New menu area for content (folders, items)
Module Page: Add a module page corresponding to the Home Page home page
Tool Link: New menu item that links directly to a tool (e.g. Announcements, Discussion Forum, My Grades).
Web Link: External link can be created as a separate menu item
Course Link: Menu area that can be used to link directly to a specific element in the course.
Subheader: Adding a structuring subheading
Divider:
Add a dividing line to clearly divide the menu area.
Click on the corresponding area you want to add (e.g. Content Area).- In the new window, you can directly enter a name for the menu area.
- Make sure that Available to Users is active
Finally, confirm with Submit.
IMPORTANT: The menu area must be made visible to students! This is done by clicking in the box in front of Available to Users.
Changing menu headings
To change a menu item, click on the arrow symbol next to the corresponding area. You then have the following options:
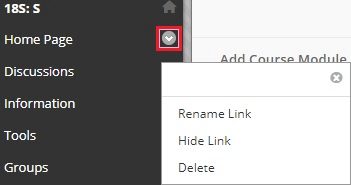
Rename Link: Click this to change the name of the menu item. You can then change the name directly and confirm the change by clicking on the checkmark symbol. The red cross symbol can be used to discard the change.
Hide Link/Show Link: This can be used to set the availability of menu items. (A sign next to the menu area indicates when an item is not visible to students).
Delete: Here you can delete entire menu areas.
ATTENTION: Menu items are only visible to students when an element is included in them! Before that they are only visible in Edit Mode ON. See Student Preview & Edit Mode
ATTENTION: If you delete a menu item, the content will remain in the course, but any structure of the content area will be lost. The files can be retrieved via the Files function in Course Management.
Insert course content
You can add content to your Blackboard courses via Build Content / Insert Content.
- Giving structure (New Page: Content Folder & Module Page)
- Insert content (item, file, audio, video, image, web link, etc.)
Tips for presenting content in Blackboard:
- Present information in blocks.
- Insert headings and sections.
- Use other outline elements (e.g. bullets).
- Highlight keywords.
- Present one idea per paragraph in texts.
- Mention the most important information at the beginning, followed by details.
Please note that Blackboard offers many different ways to present and insert content. On this page you will find possible applications regardless of the fact that there are various other possibilities.
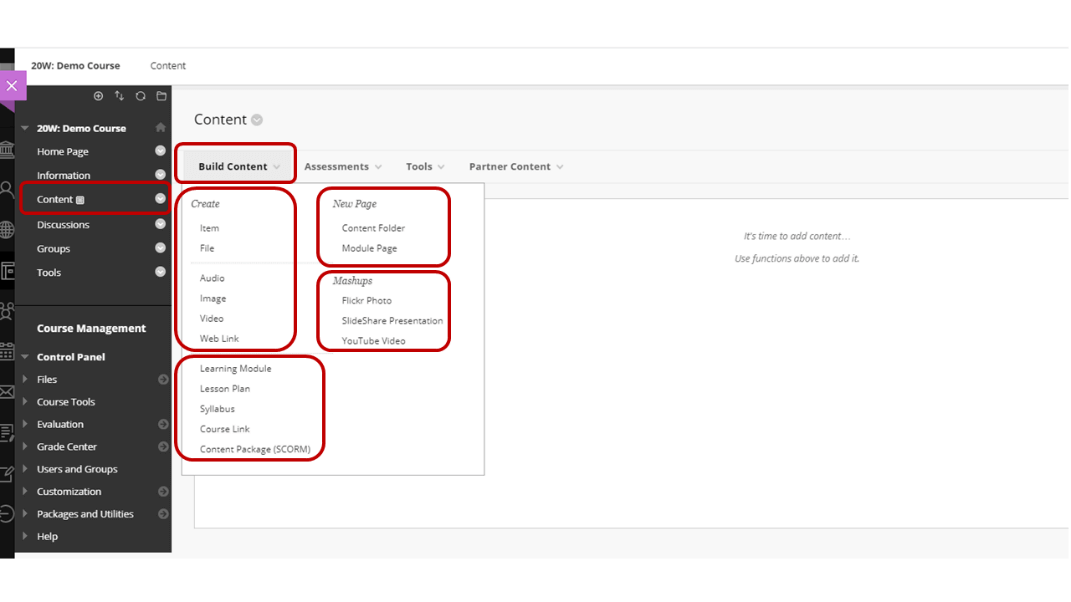
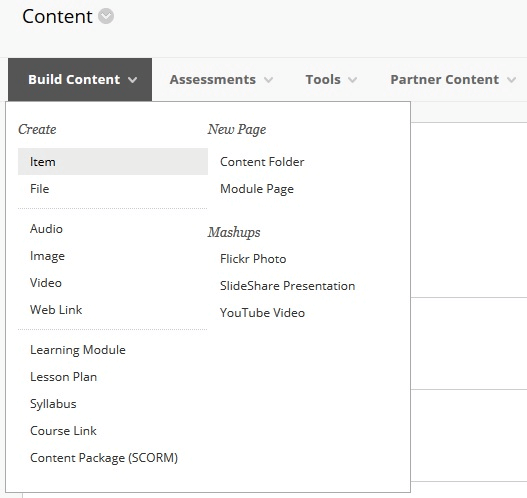
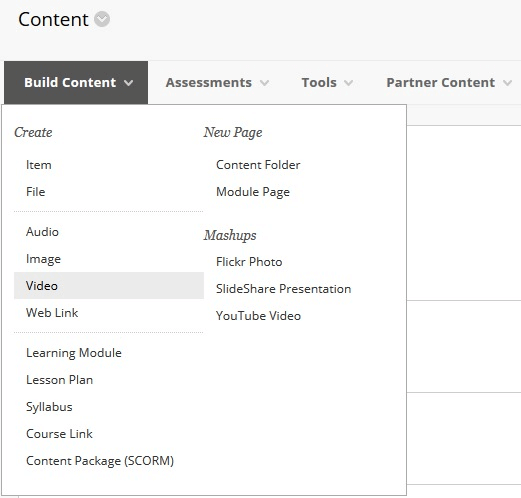
Overview: Build Content / Insert Content
In the menu areas (e.g. by default Content) content and folders (and/or learning modules) can be created. Select Build Content and you can fill your courses with content or select further structural elements:
Create:
- Item, File, Audio, Video, Image
- Learning Module, Lesson Plan, Syllabus, Course Link
New Page:
- Content Folder, Module Page
Mashups:
- Flickr Photo, SlideShare Presentation, YouTube Video
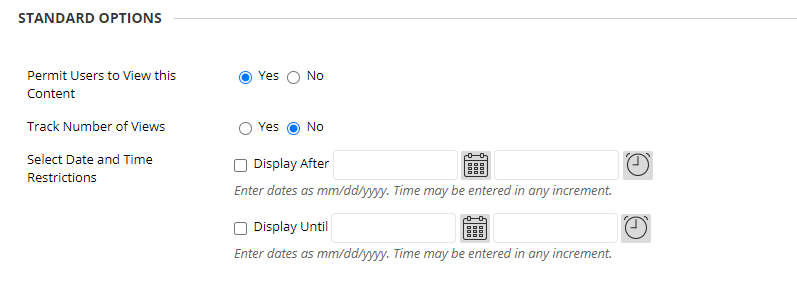
The availability of the contents / content elements is regulated in the Standard options area. For example, content can only be displayed for a certain period of time (from/to).
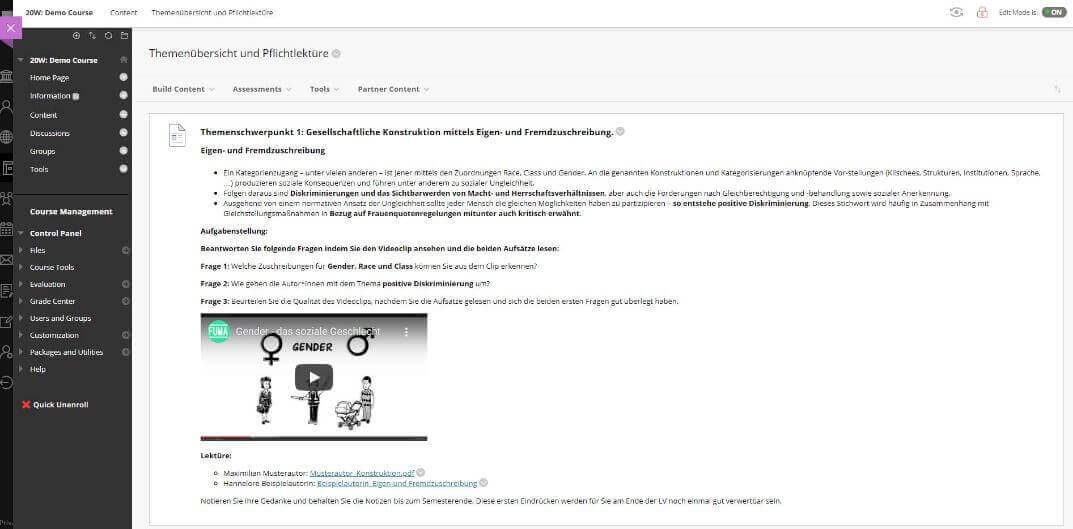
Item / Element
- Items / elements offer the possibility to create a combination of contents.
- Using the editor functions, you can format texts, attach files, integrate multimedia, insert links, equations and tables.
- The added content is displayed directly on the screen; if the element is filled with longer texts, it can be scrolled up / down.
In the following application example:
- creates a content element,
- Text inserted and formatted,
- a video embedded and
- a text file attached.
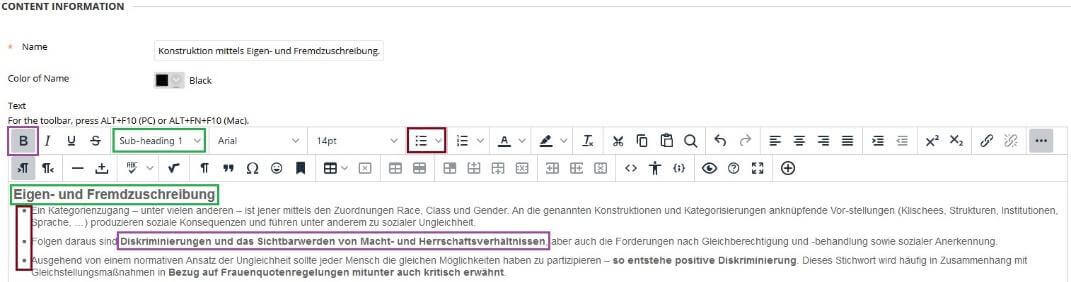
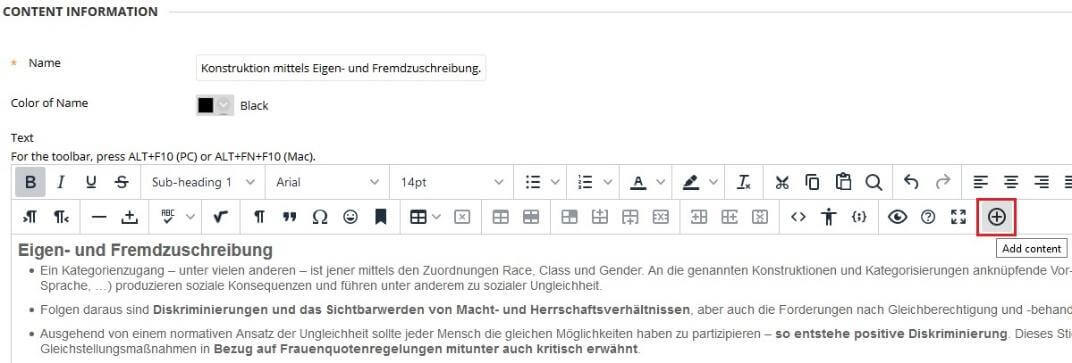
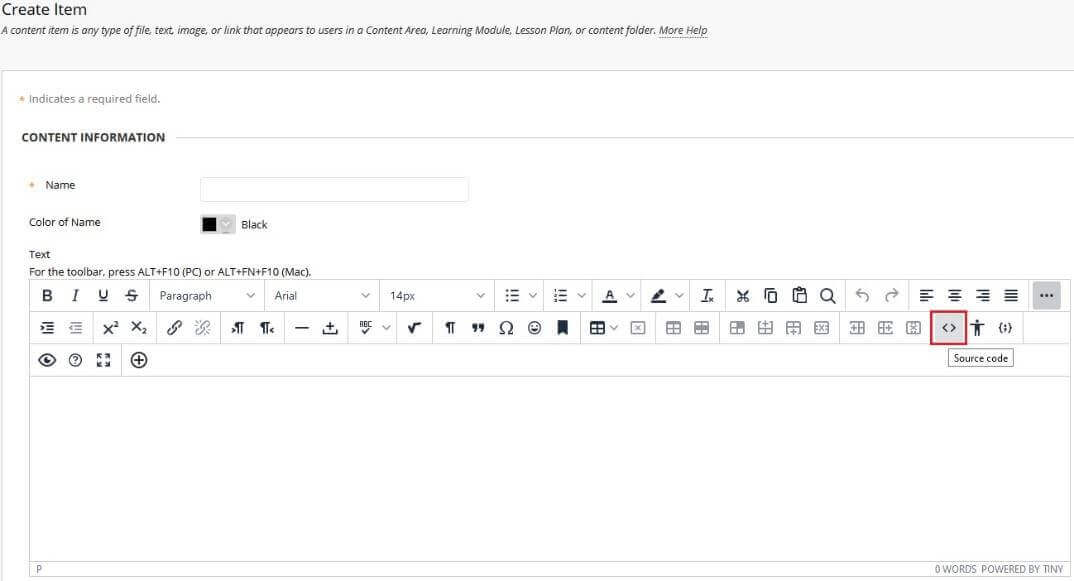
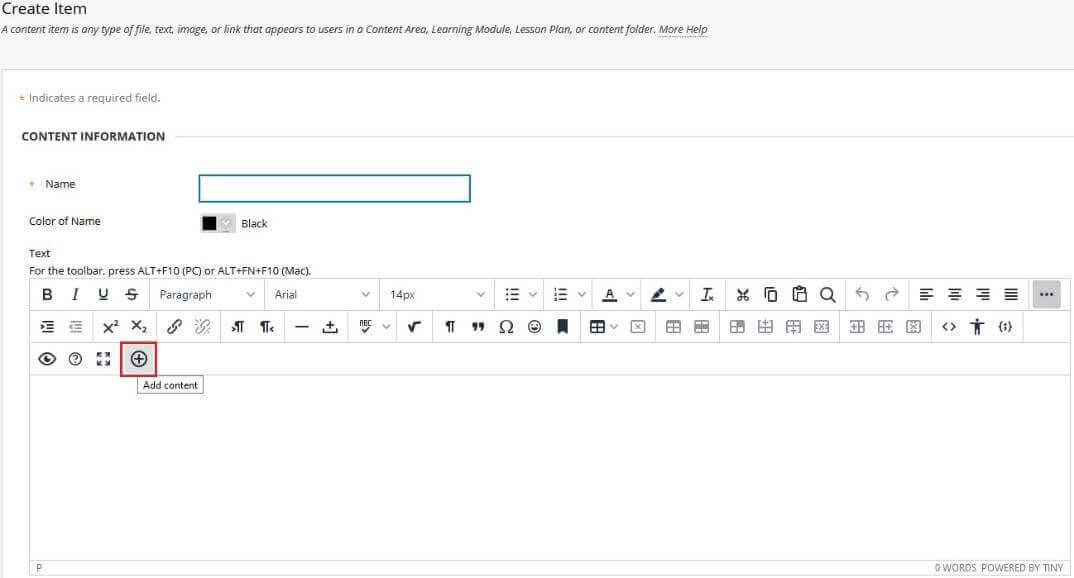
- Open the appropriate menu area (or learning module or folder) Item/Element you want to create and select Build Content → Item.
- Insert a name for the element.
- In the text field you can now insert the actual text (if necessary, format text such as highlighting in bold, formatting headings, bulleted lists, etc.)
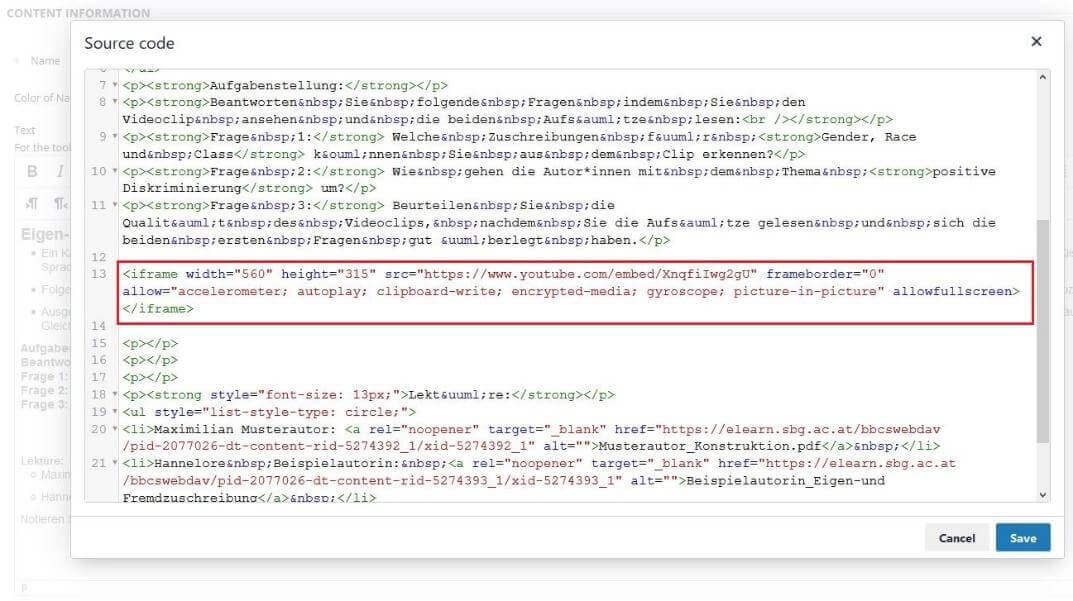
Embed video directly into the body text
- In the example given here, the link to a Youtube video is embedded via "Source Code" (see icon in screenshot <> ).
- Copy the embed link (Youtube/Vimeo > Share > Embed) and paste it in the desired area.
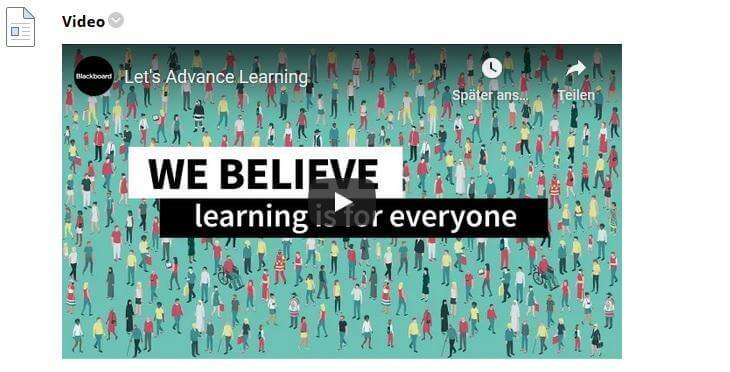
- This video will be played directly in the course.
There are different options for inserting video files into a Blackboard course. You can find a detailed description under:

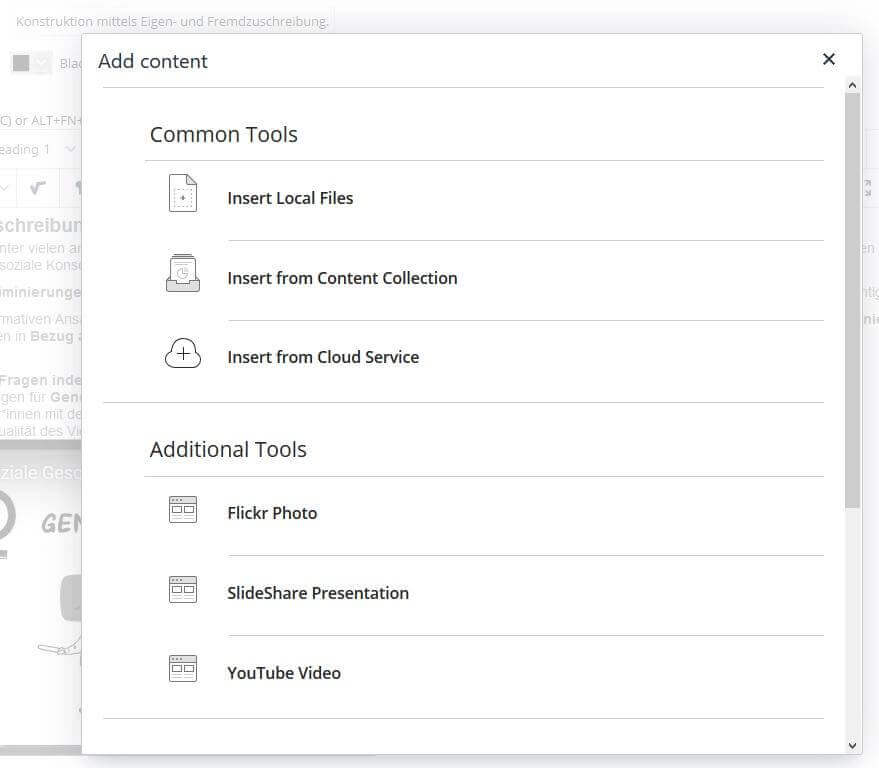
Embed Attach files
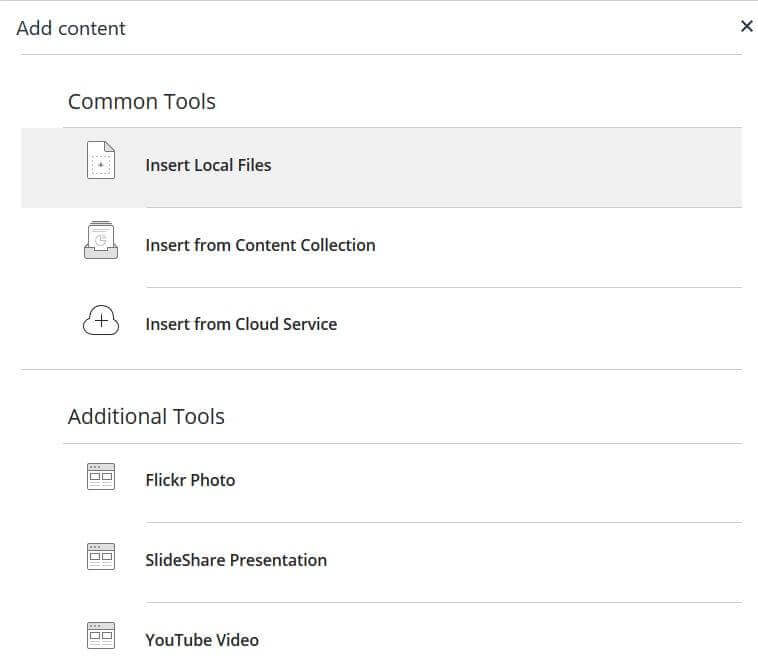
- Via the plus symbol (+) you can set a link to a file in the text field and
- Select them via Insert Local Files on your computer. Furthermore, files from the Content Collection or from Cloud Services can be attached.
- You can assign a display name, which is then displayed in the text field as a deposited link.
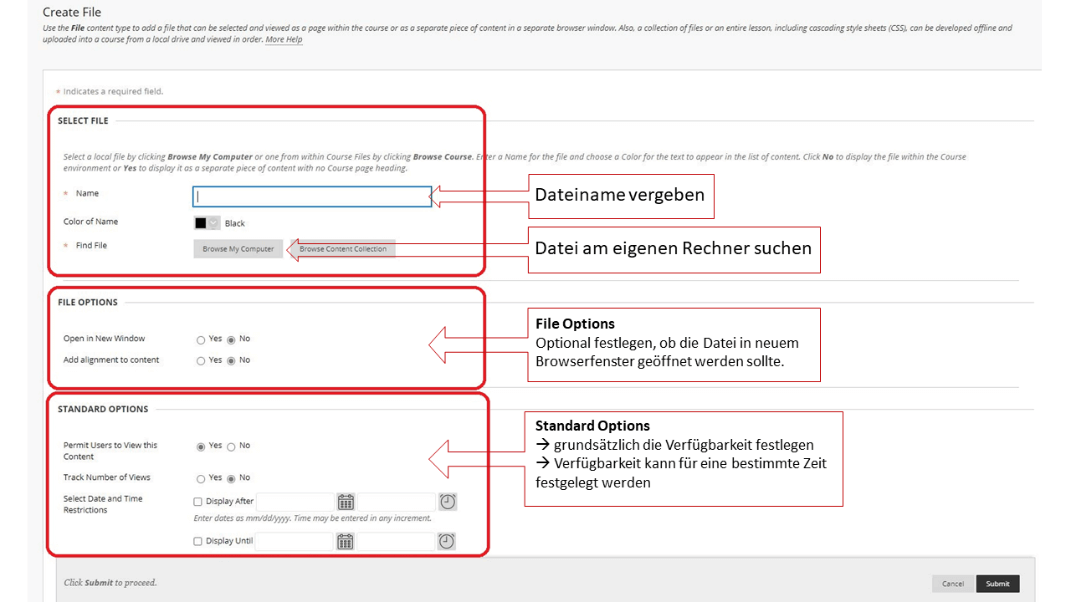
File / file
- Create a link to a file.
- Since you can't add a description for the link, make sure it's descriptive.
- You can choose to display the file as a page within the course or in a separate browser window/tab. For some file types, such as Word documents, students must download the file to view the content.
- With this type of content, you save screen space and have to scroll less.
Multimedia files (audio, graphics, video)
You can upload multimedia files (audio, graphics, video) from your computer or browse the course file repository: Course Files or the Content Collection.
More information about adding videos.
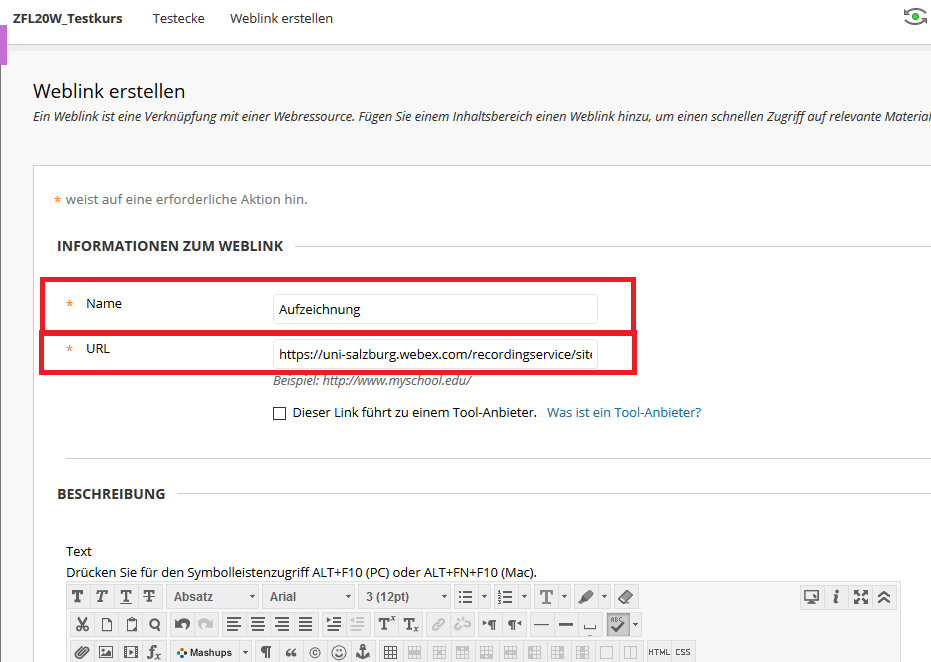
Web link
You can create links to an external website or resource.
Select the corresponding content area and under Build Content you can provide the link directly in the course by means of Create Web Link. If necessary, an explanation, a work task, etc. can be inserted in the Description area.
If you have created recordings using Webex, for example, you can also provide the link to the recording using Web Link.
Other content element:
Learning Module / Learning Module
A learning module is a container for content where learners can navigate through the content from a table of contents. You can add all types of content, including content items, file attachments, links to websites, tests, exercises, and multimedia items.
Lesson Plan / Lesson Overview
A lesson outline is a content container that stores the content items that learners need to complete a lesson. You can also add lesson profiles, learning objectives, required materials, and more.
Syllabus / Curriculum
You can attach an existing syllabus file or use a step-by-step process to create a course syllabus.
Course Link / In-course Link
You can create a shortcut to an element, tool, or section of your course that provides quick access to relevant materials.
Content Package (SCORM)
You can add web-based learning content called a SCO or Sharable Content Object. These SCOs are bundled into a compressed file called a content package. The compressed file can be unpacked and played with a content player. Individual components or complete packages are usually provided to you by schools, private companies, or other sources.
More information about content packages
Content / Content folder
You can create content in folders and subfolders. Use folders to reduce scrolling and make it easier for learners to find materials.
Module Page / Module Page
A module page is a specialized content page that displays content in fields, such as on a course homepage. Learners can track assignments, tests, exercises, and new content created in the course. You cannot add your own content to a module page. The information in each module is generated by the system.
Mashups
You can use mashups to browse or add social media items from other websites.
- Flickr Photo: Share photos with others.
- SlideShare Presentation: Share slide presentations, documents, or PDF portfolios.
- YouTube Video: Share videos online.
More information about Mashups
Copy course content
Course content in Blackboard can be easily copied from one course to another. There are several ways to do this:
Copy content folder
In Blackboard, please go to the course in which the content is located and open the content folder. Next to the title of the content item (file/document, folder, etc.) please click on the small arrow symbol and select "Copy" in the drop-down menu. Under "Destination" you can select the destination course and the corresponding destination folder.
Packages and Utilities (Packages and Utilities)
In the Course Management section, go to "Packages and Utilities" and select "Course Copy". A new window will open and you can select which content elements of the existing course should be copied to the new course (Destination Course ID). Using "Browse" the destination course can be selected and under "Select Course Materials" you can choose which content areas (content folders) will be copied to the destination course.
https://help.blackboard.com/de-de/Learn/Instructor/Course_Content/Reuse_Content/Copy_Courses
Insert video recordings
Recommendation: Start recordings directly from Blackboard via Webex. After processing, the recordings are automatically available in the Blackboard course under Webex > Recordings. The recordings created in this way can also be found on your personal Webex page. In the Webex Personal Room you can delete and edit recordings (block download etc.).
There are other ways to make videos available in a Blackboard course:
Embed video directly as element via embed link
Go to Content > Build Content > Item:
Now select the <> Symbol Source code under Text:
Copy the desired embed link and paste it at Source code. You can find the embed link on Youtube or Vimeo videos, for example, under Share > Embed:
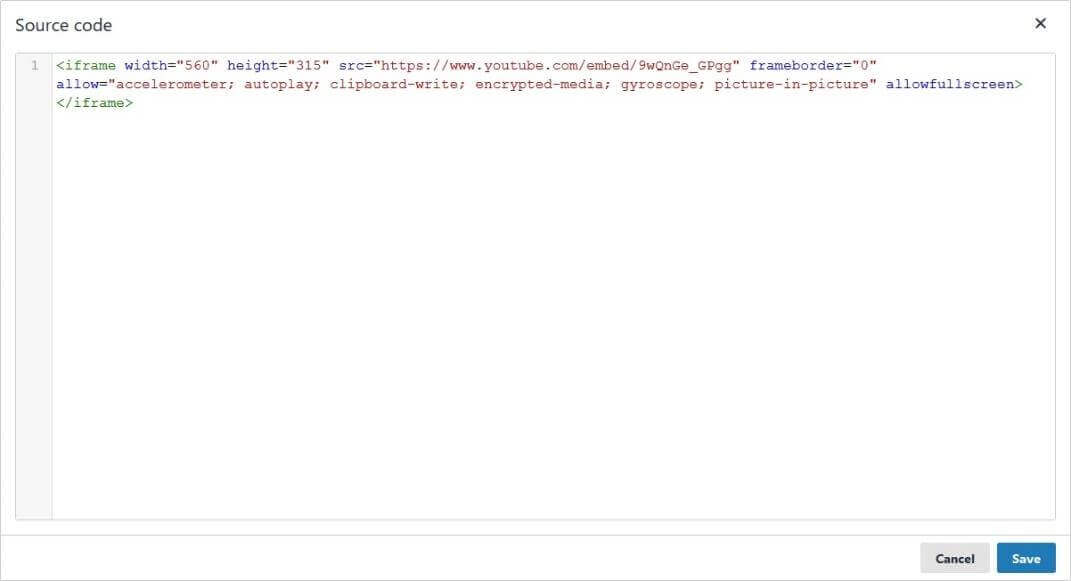
Confirm with Submit and the video is available in your content area:
Embed video as file (MP4)
Go to Content > Build Content > Item:
Now click on the + symbol Add Content under Text:
Click Insert Local Files to upload a locally stored video. You can also insert videos from the Content Collection, from Cloud Services or directly from Youtube (learn more about YouTube).
Confirm with Submit and the video is available in your content area:
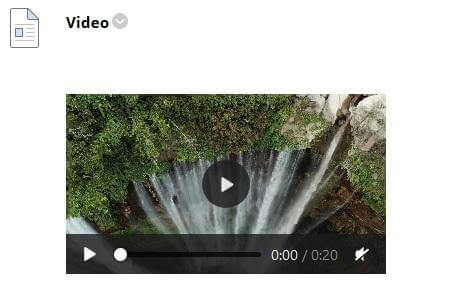
Insert video with download button
Go to Content > Build Content > Video:
You can now decide whether you want to insert the video from your computer (Browse my Computer), from the Content Collection (Browse Content Collection) or directly from Youtube (Browse Mashups):
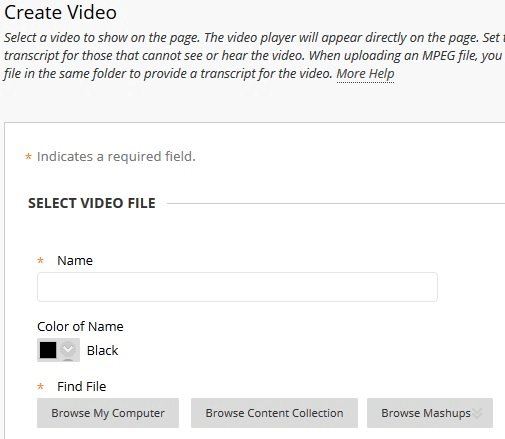
Select the desired file, enter a name and confirm with Submit so that the video is displayed with a direct download link in the content area:

Student Preview & Edit Mode
- Edit Mode must be ON to edit courses.
- Student Preview allows you to view the Blackboard course from the student's perspective. In addition, Student Preview allows instructors to try out tools and features from the student's perspective.
Edit Mode
You can directly edit all content items and tools in the Blackboard course.
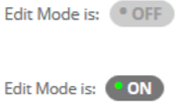
Prerequisite for this is the active Edit Mode. With a click on the button you can activate or deactivate the edit mode:

Edit Mode is: OFF = inactive edit mode / student view
Edit Mode is: ON = active edit mode
Student Preview (classic course view / original view)
This function allows you to slip into the role of the course participants.
- reviewing the student view of the Blackboard course, and
- also allows teachers to try out tools and functions from the perspective of the course participants.
This makes it possible for teachers to hand in documents on a trial basis, to take tests or to get an impression of how the My Grades area including assessments and teacher feedback looks like for students in the course. Documents, entries or test attempts submitted by teachers in preview mode can be deleted from the course at any time when leaving preview mode.
Classic Course View / Original View
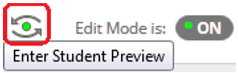
... and so you can work with this function:
Click Enter Student Preview in the upper right area next to Edit Mode:
The following status bar appears at the top of the window when Student Preview mode is active:

Settings: Here you can set whether documents and entries are deleted automatically when you exit the preview mode or whether you are asked to do so separately.
Exit Preview: If you have not set automatic deletion under Settings, you will be asked when exiting the Student Preview mode whether you want to keep or delete the preview user data.