

 Italiano
 Portugês
 Deutsch
 Српски језик
 Eesti
Eesti
1. The Basics: Menu, Open and Save Files
Audacity is a freeware software that contains a huge number of features that allows you to create professional podcasts. You can download it free from the internet:
1. The process of creating a podcast may be the following:
2. Select and prepare original sounds (= excerpts from interviews)
3. Write "script" and manuscript Record moderation
4. Mix original sounds, moderation, music, noises together
We start with the basics. For further information on Block 1, 2 and 3 see next page.
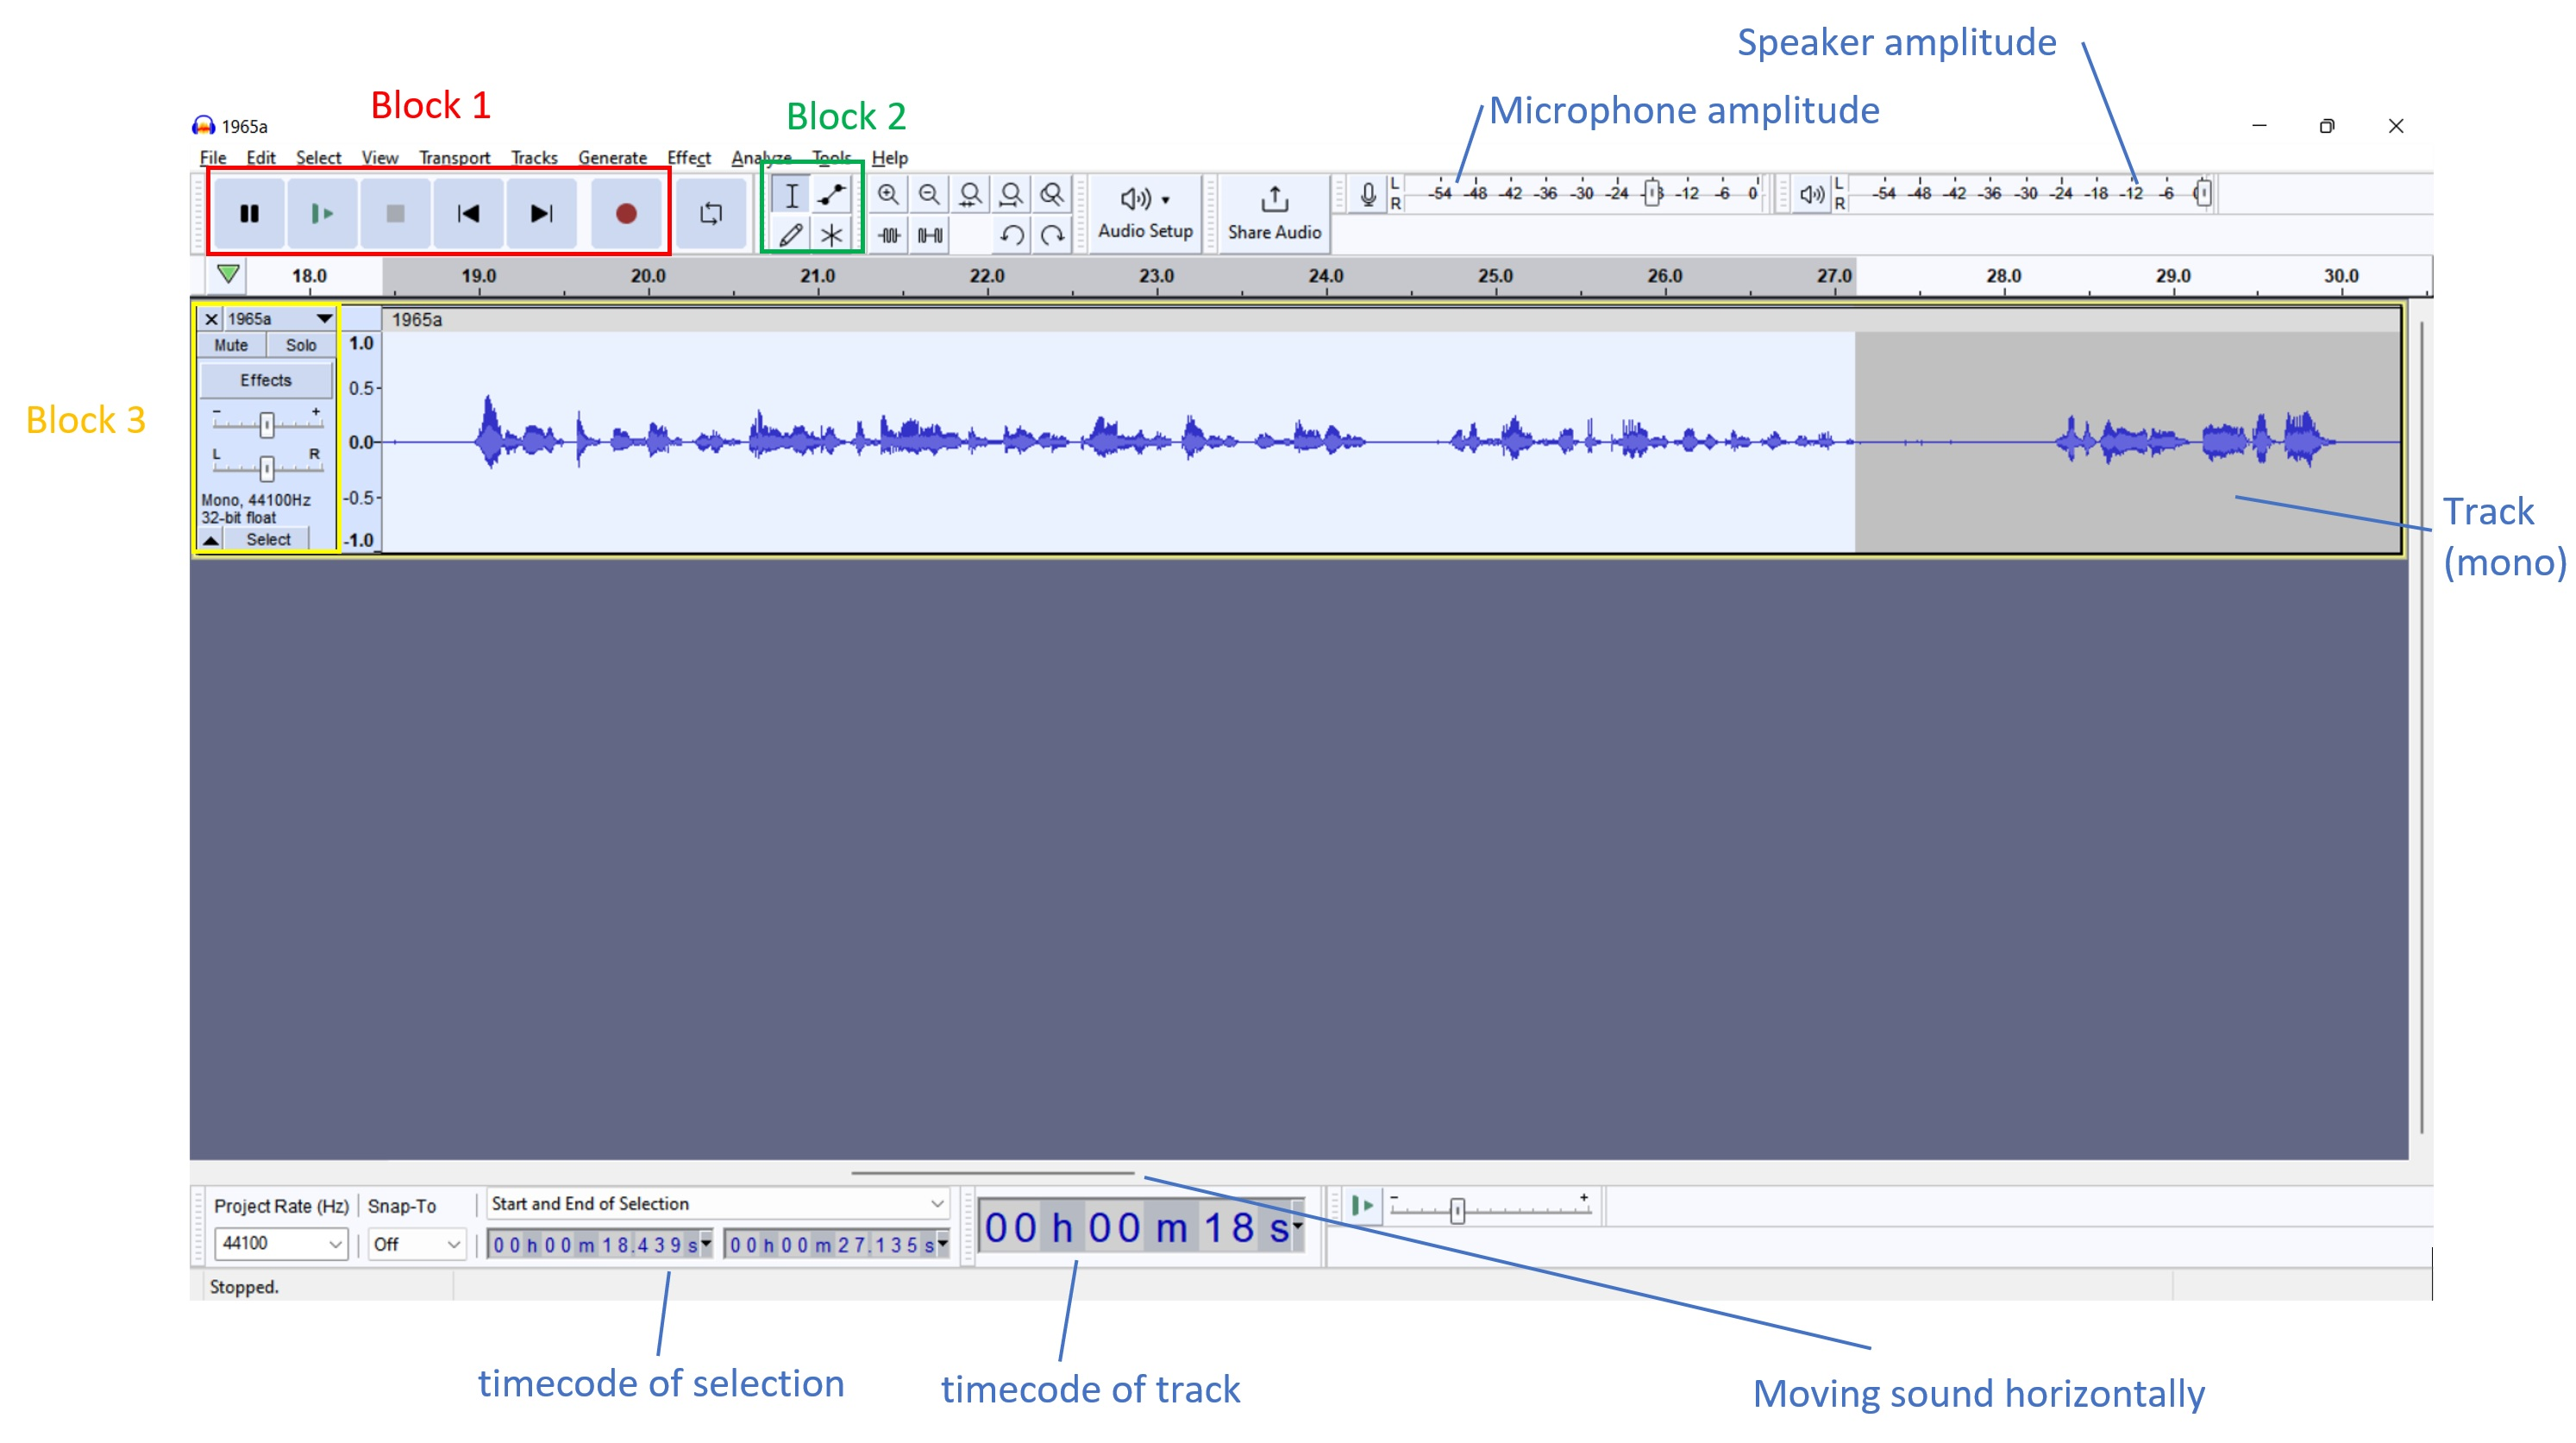
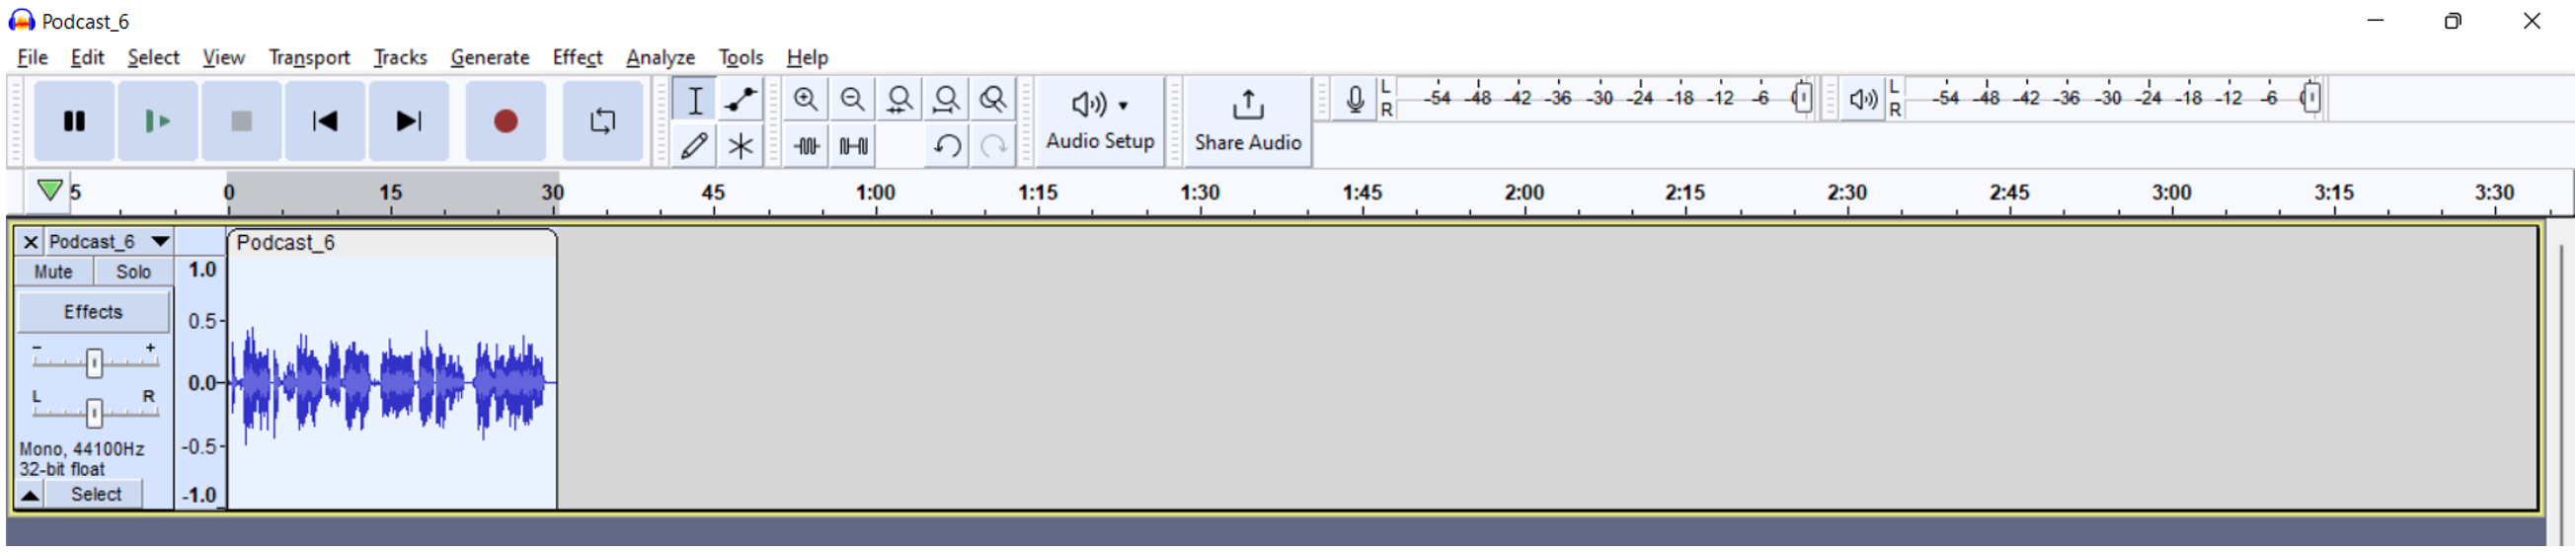
The Main Menus
Block 1: Transport and Recording

1. Pause
2. Play (also with spacebar)
3. Stop (also with spacebar)
4. Skip to start
5. Skip to end
6. Record Loop (Repeat)
Block 2: Editing Tools

a) Navigate and mark (position with mouse click, select area with mouse button pressed)
b) Envelope tool (Adjust volume, set anchor points with mouse click, move with mouse pressed -> louder and softer)
c) Draw (detailed corrections in sound wave) [rarely used]
d) Multifunction tool: Several of the above functions evenly
e) Zoom in
f) Zoom out
g) Fit selection to width
h) Fit project to width
i) Trim audio outside selection
j) Silence audio selection
l) Undo
m) Redo
Block 3: Information and Tool for Tracks
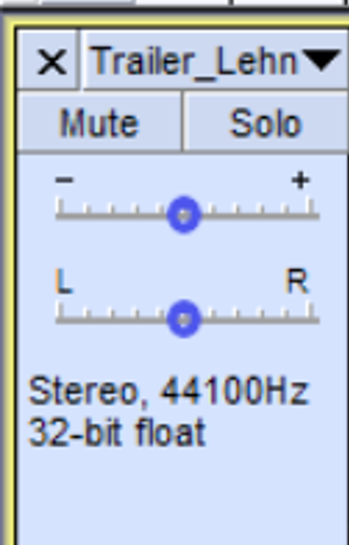
Mute – mutes track
Solo – only this track is active
Volume of the track (- +)
Balance of the track (L R)
Information on Track
Open and save files
Open file
File -> Open: Select file and press “Open”
Open/Import another track (the existing track(s) remain, you add another track)
Import -> Audio: Select file and press “Open”
Save file (all tracks are mixed to one)
File -> Export -> Export as [select filetype]: Select filename, type, quality and location and press “Save” (use a non-compressed type like wav while working on a track/project, at the end you can save in a compressed format such as mp3 to save memory)
Save project (all tracks remain separated)
File -> Save Project: Chose filename, type, location and press “Save”
File -> Save Project as: Choose different filename, type, location and press “Save”
2. Recording
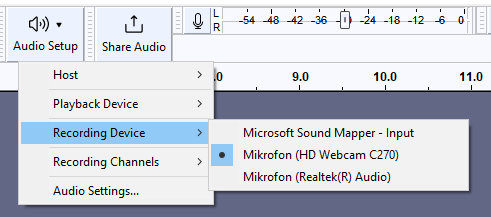
Choose your recording device (via Button “Audio Setup”)
Press Pause-Button, press Record-Button
Adjust the sensitivity of the recorded source (best to have peaks at -12, make a test recording)

Press Pause-Button to start Recording, press Pause-Button again to preliminarily stop (“pause”) the recording. If you want to finish the recording, press the stop button. Now you have a new track with your recording.
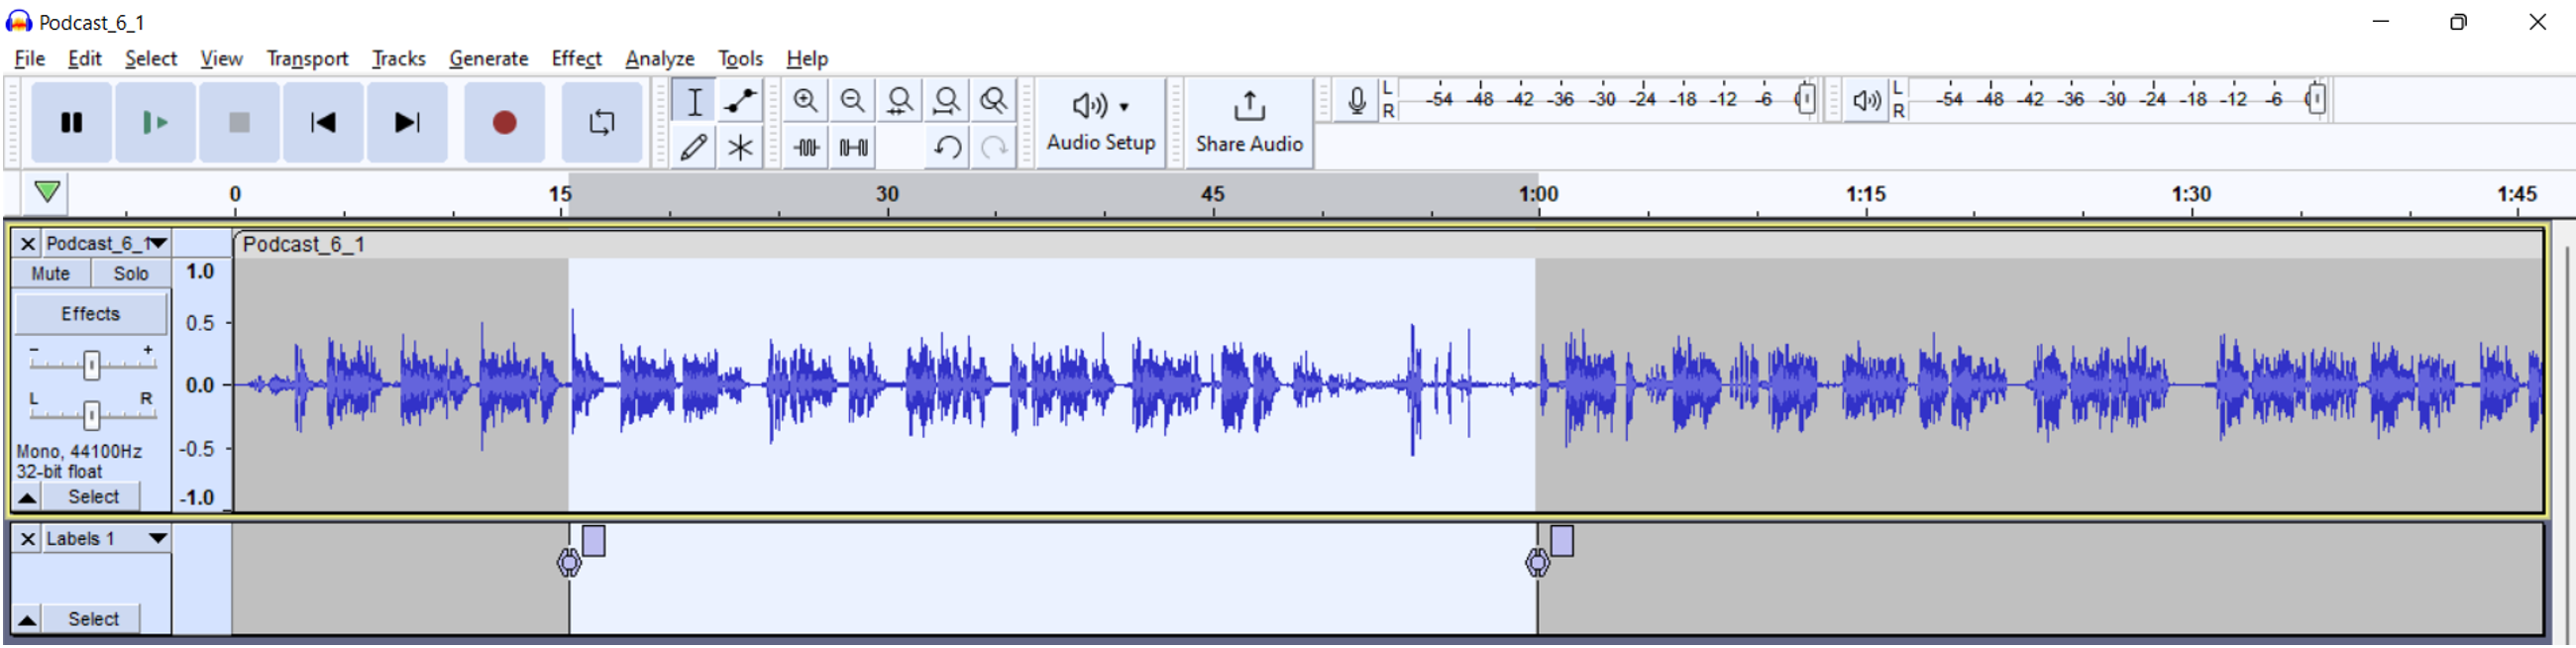
3. Select original sounds from interviews or recordings
1. Open file with interview/Recording: File -> Open: Select file and press “Open”
2. Select part of interview (according to protocol, e.g. 4.05-4.48, leave a few seconds "reserve" before and after, mark with left mouse button held
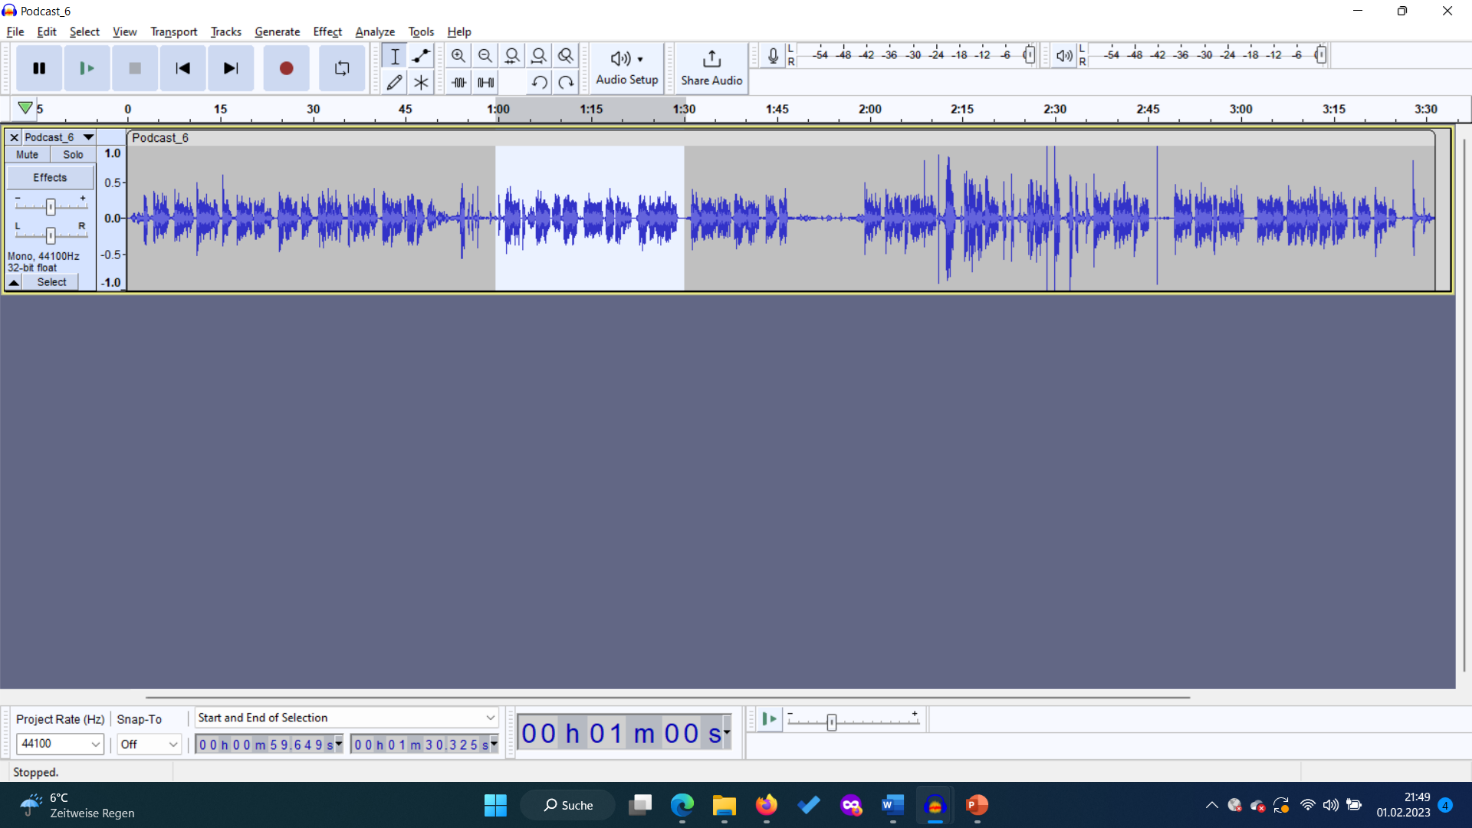
3. Press button “Trim audio outside selection” from the menu above or CTRL-T, move the remaining sound to the beginning of the track. You can move sounds with mouse button held at the upper left corner of the sound (a “hand”-symbol is shown when ready to move).
4. Save file: File, Export, Export as WAV, select file name (e.g. podcast1 or podcast_ideas), format WAV 16-bit, Save
5. Proceed analogously with the next parts of the interview/recordings.
4. Prepare sounds
1. Open File: File -> Open, Select file
2. Menu Effect -> Normalize: Normalize volume to standard level: Select all, CTRL A, then Normalize effect.
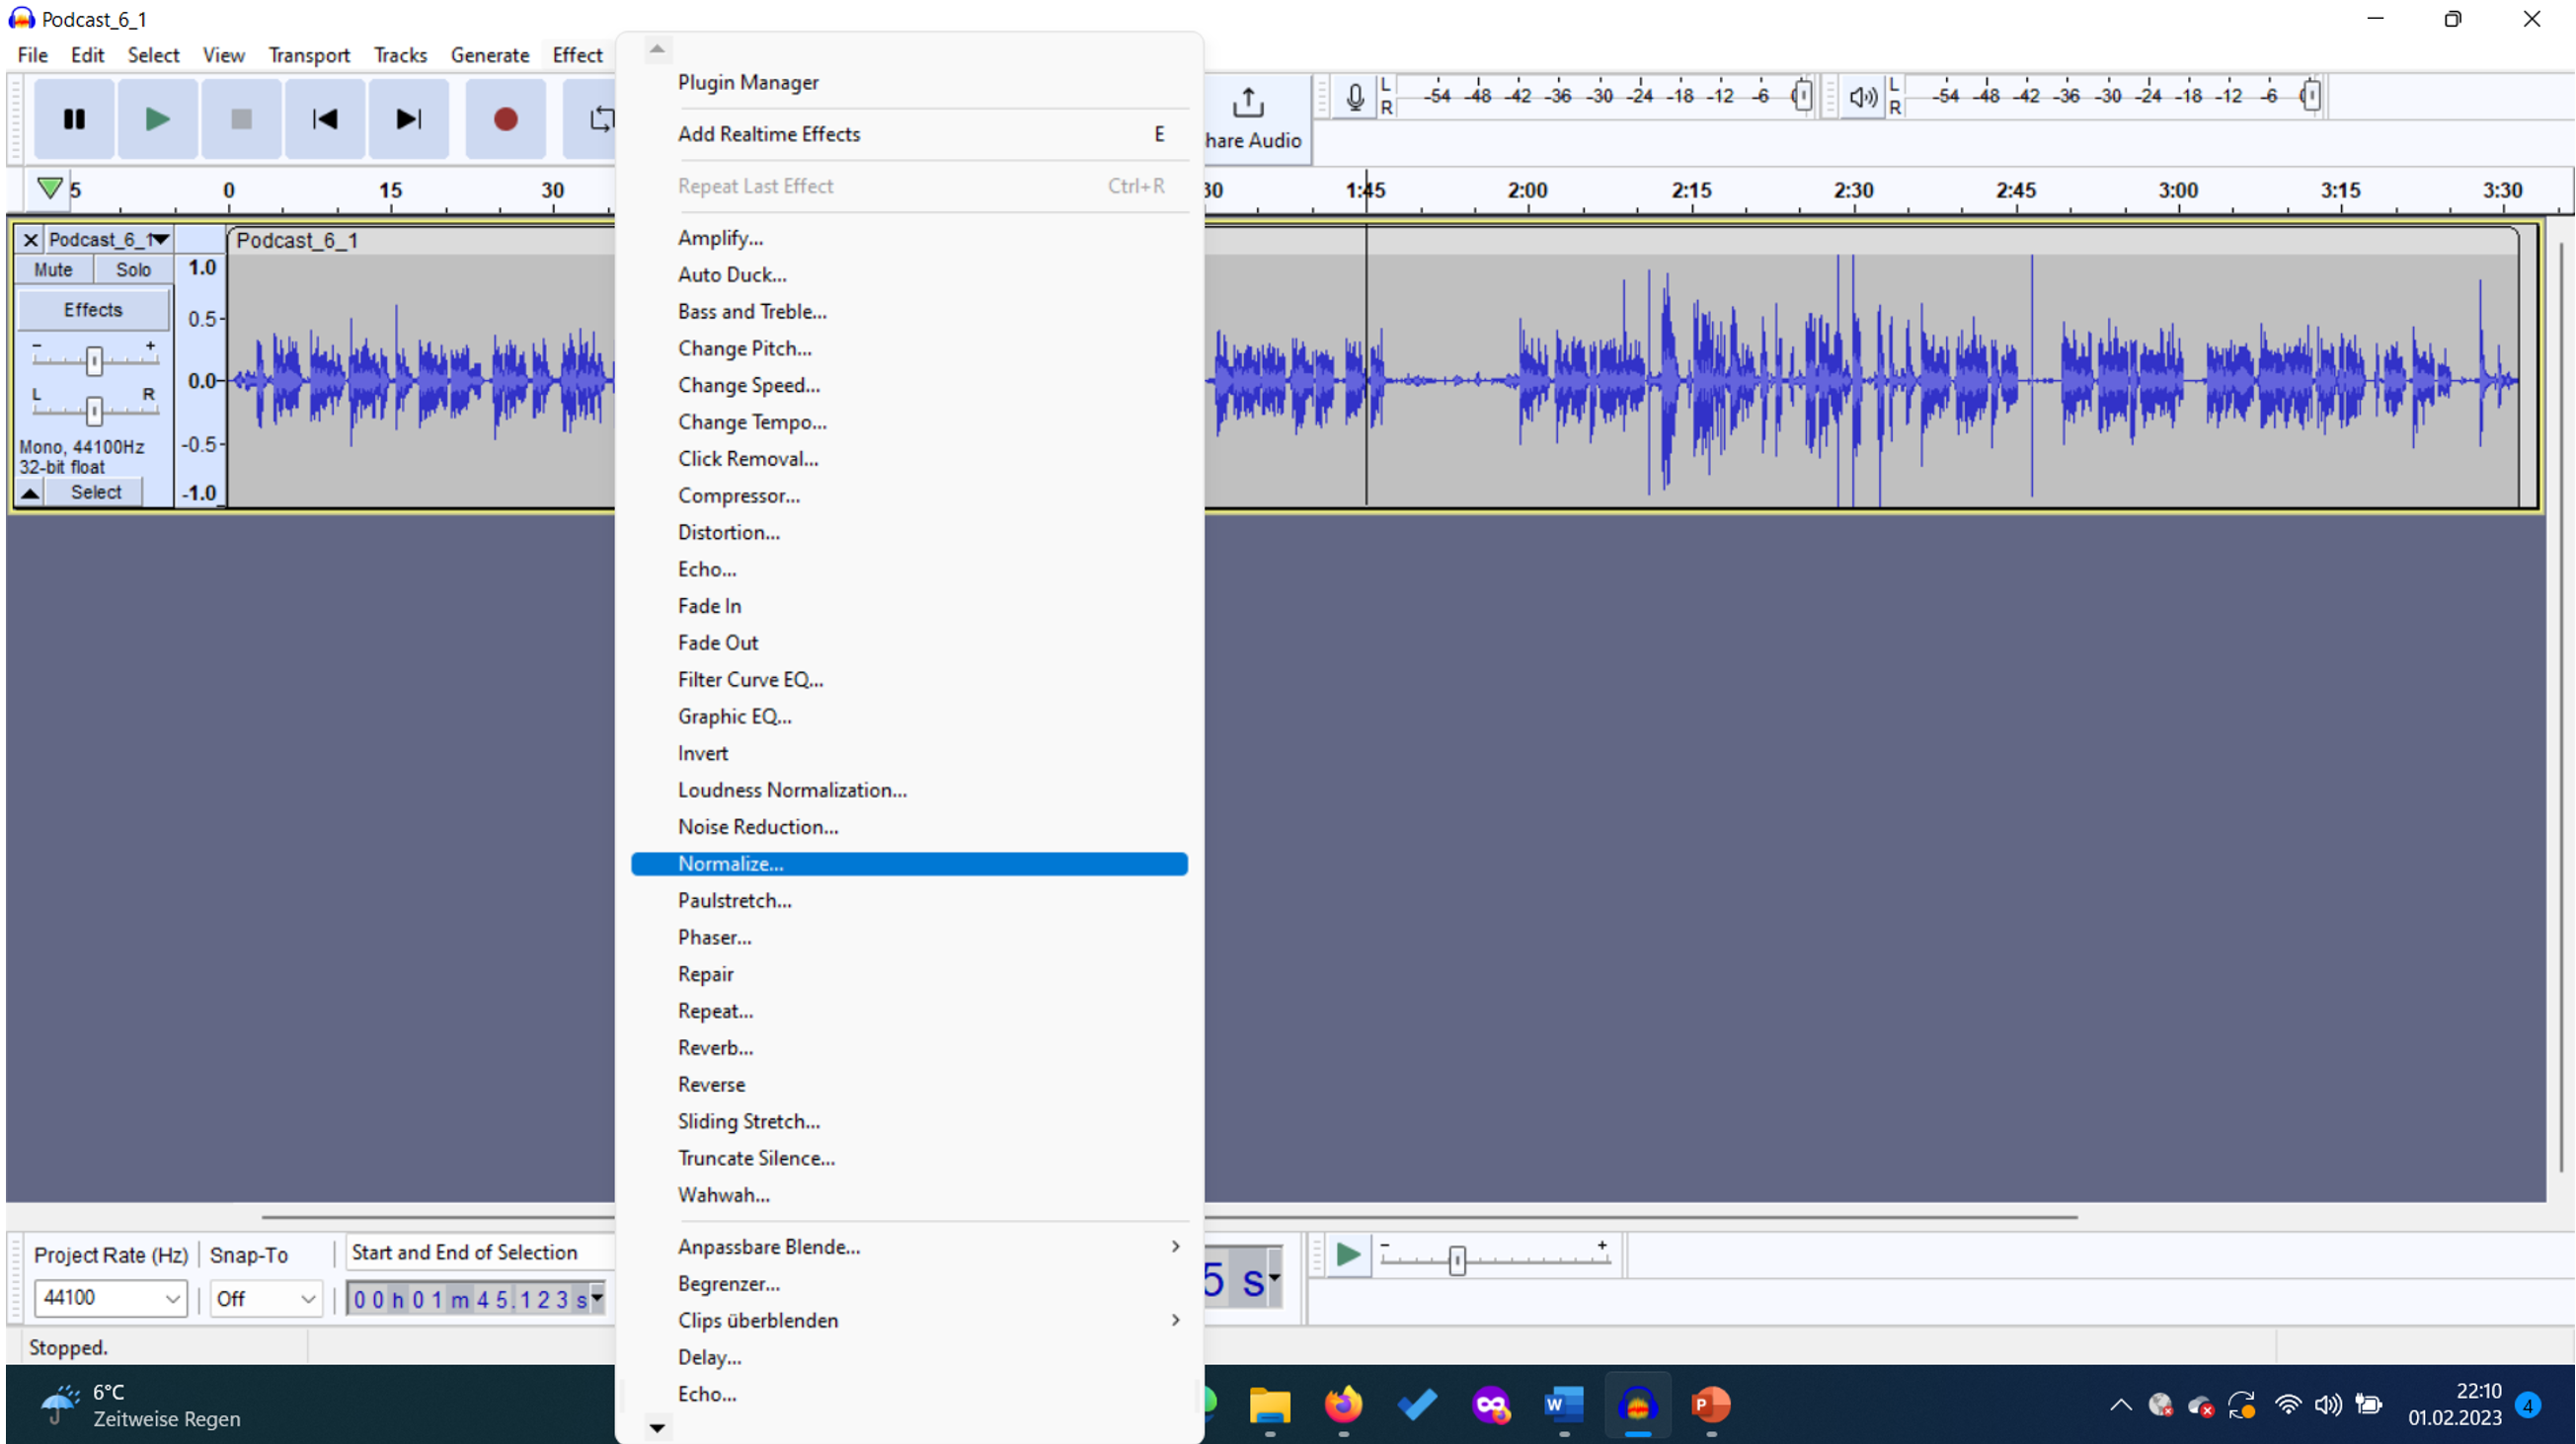
3. If necessary cut out loud parts before: Mark parts, then Edit -> Cut.
4. Select beginning of sound (with mouse click, if necessary zoom in, attention: with loud background noise leave front and back reserve to fade in and out, under Effect): then Select -> ”At zero crossings” (short key: Z).
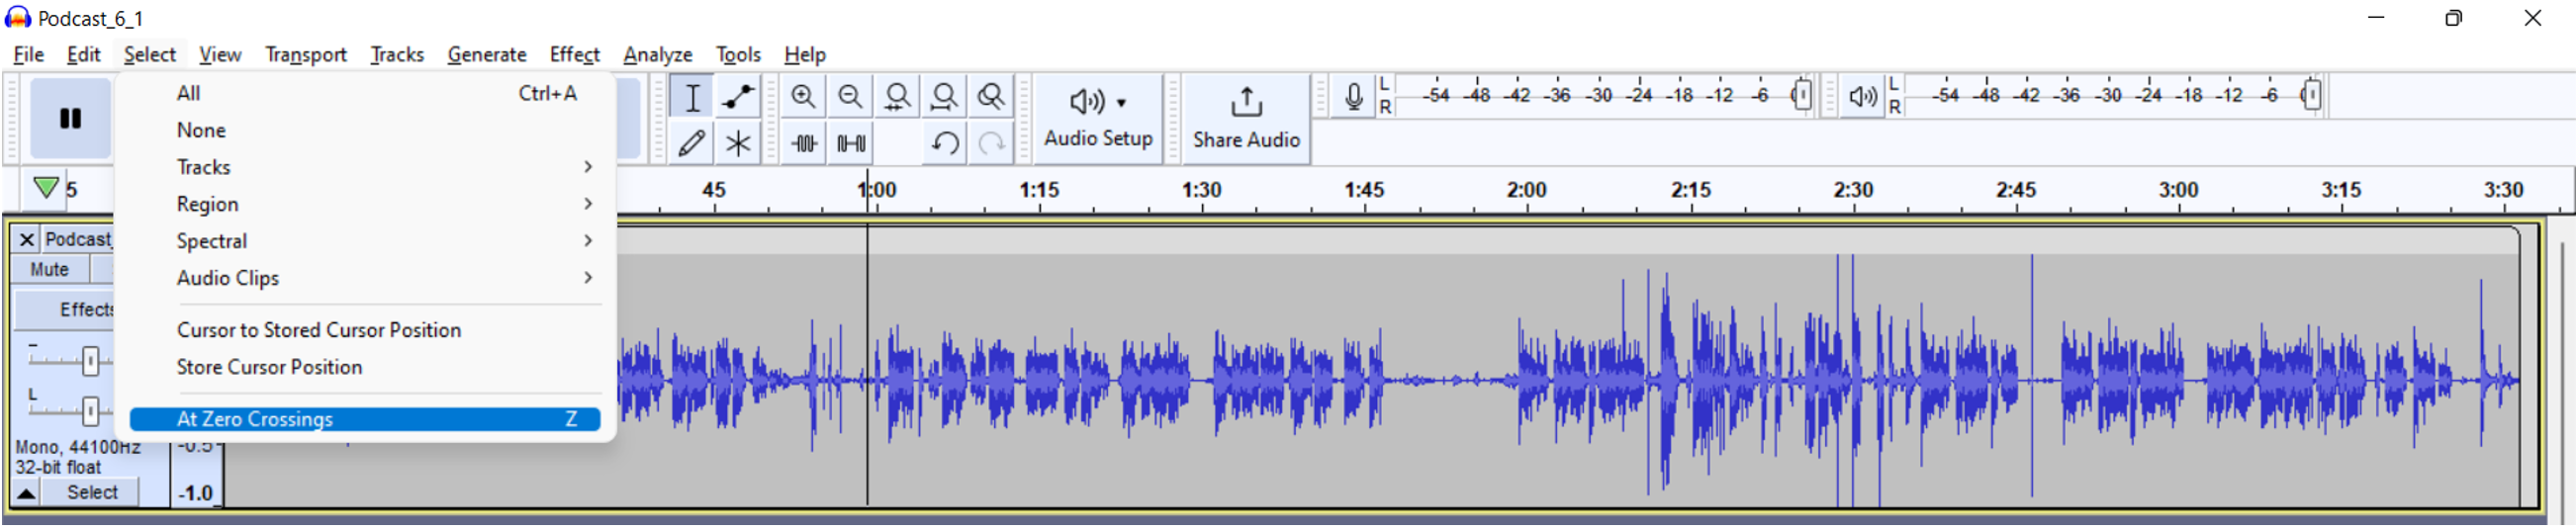
5. Then Select -> Region -> Track start to cursor (Shift+J)
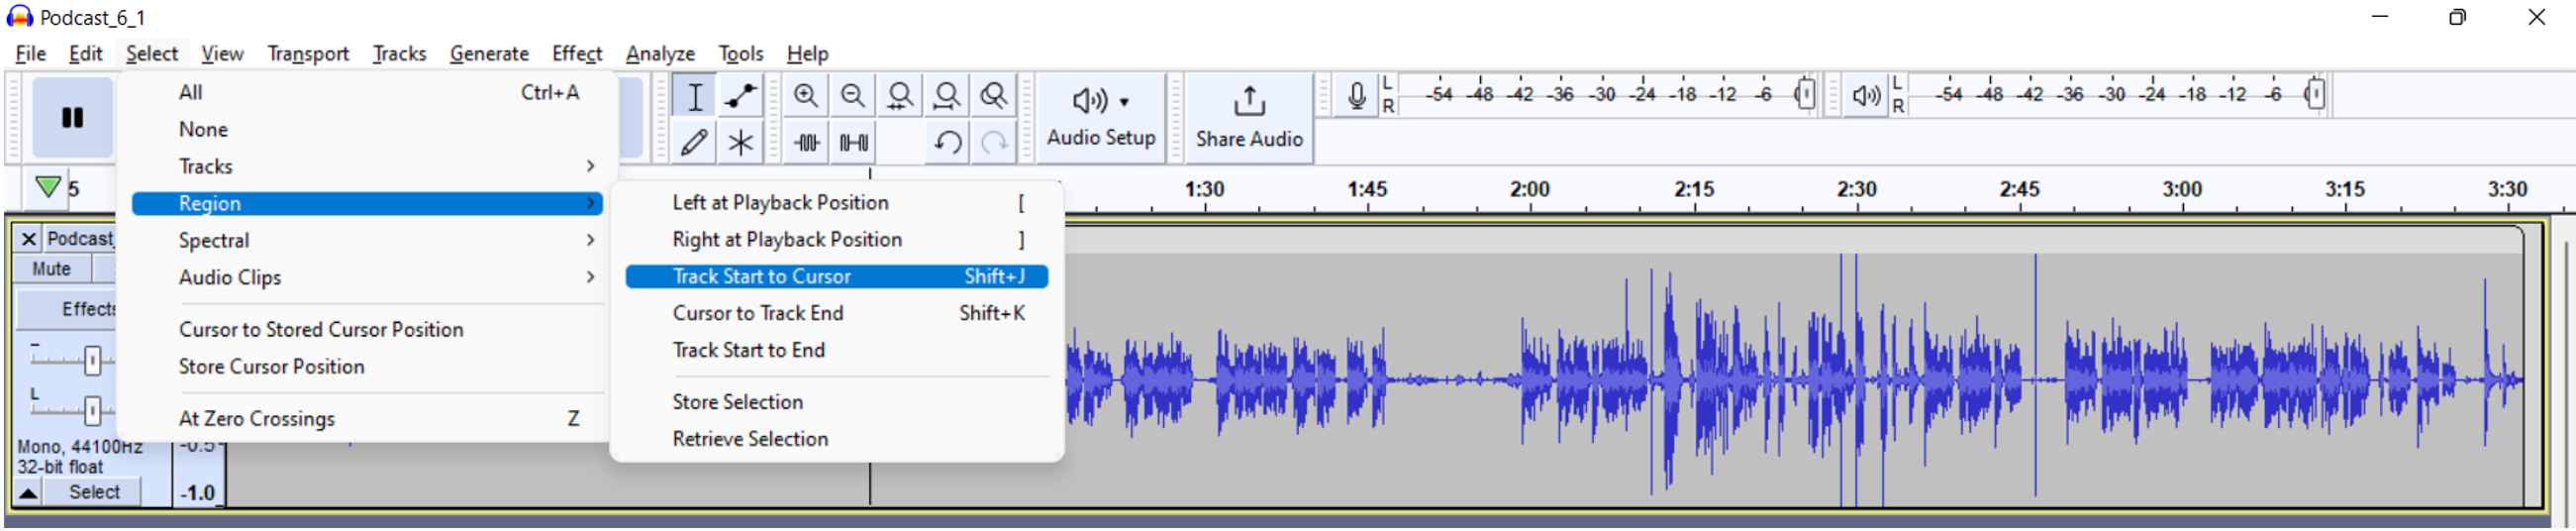
6. Then Edit -> Delete (Ctrl-K)
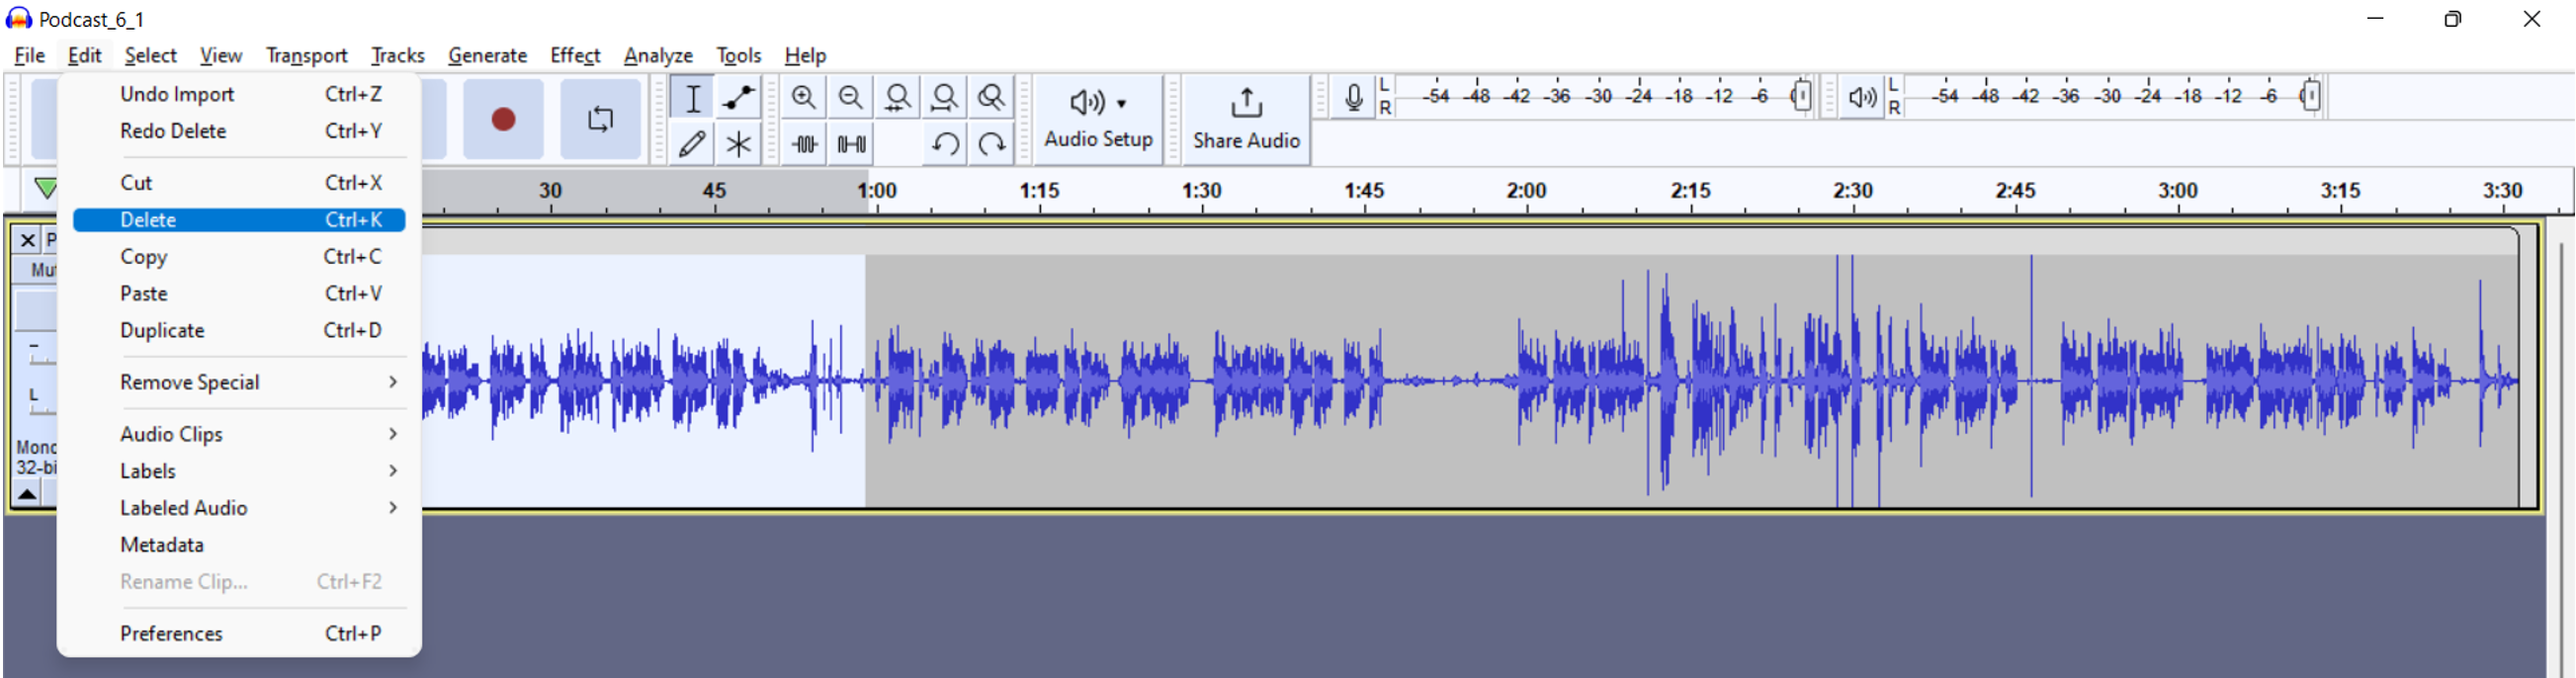
7. Do the same with the end of the sound:
Click where you want to end your sound, then
Select -> ”At zero crossings” (short key: Z),
Select -> Region -> Cursor to Track end (Shift-K)
Edit -> Delete
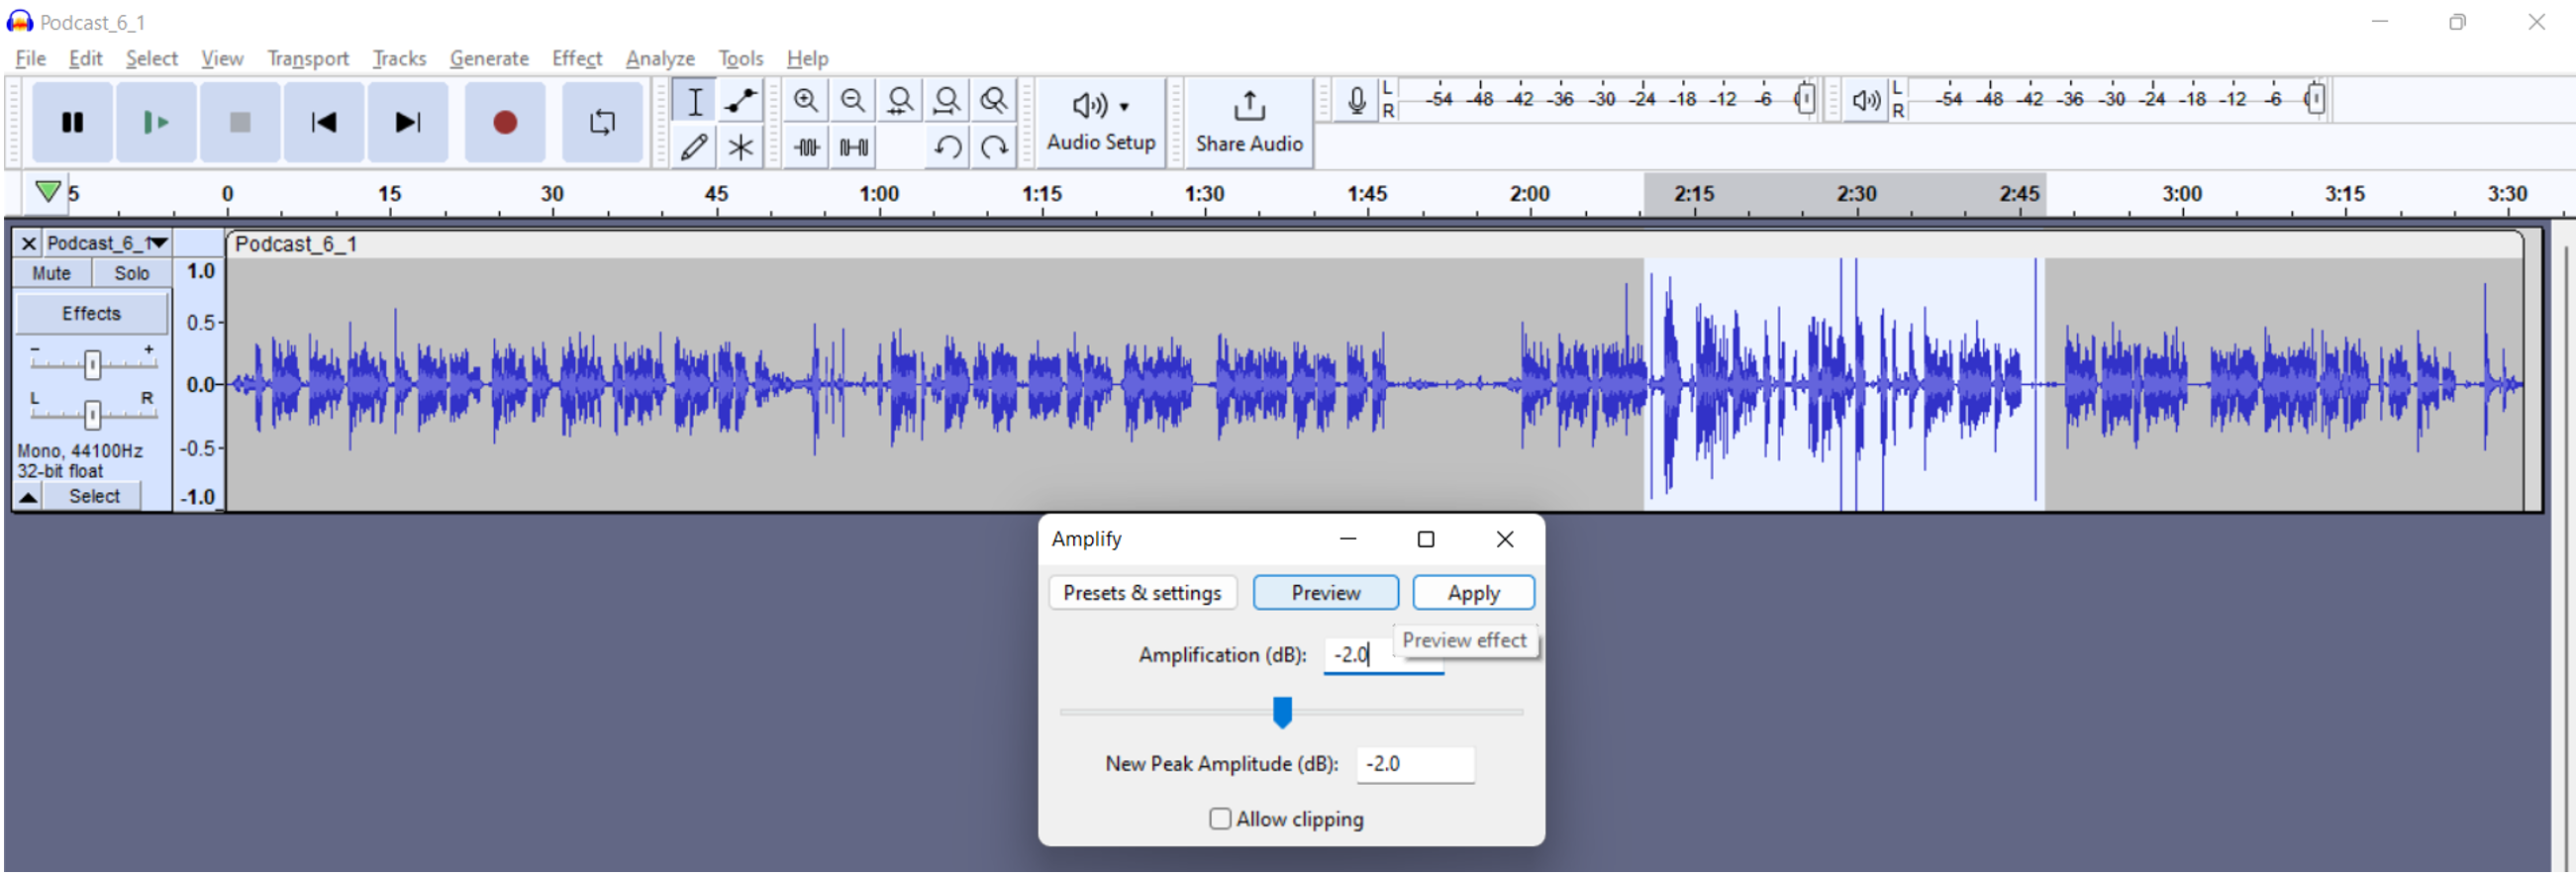
8. Normalize again. Adjust volume of selected parts (mark with mouse): Effect -> Amplify -> Amplification (dB): + louder, - softer)
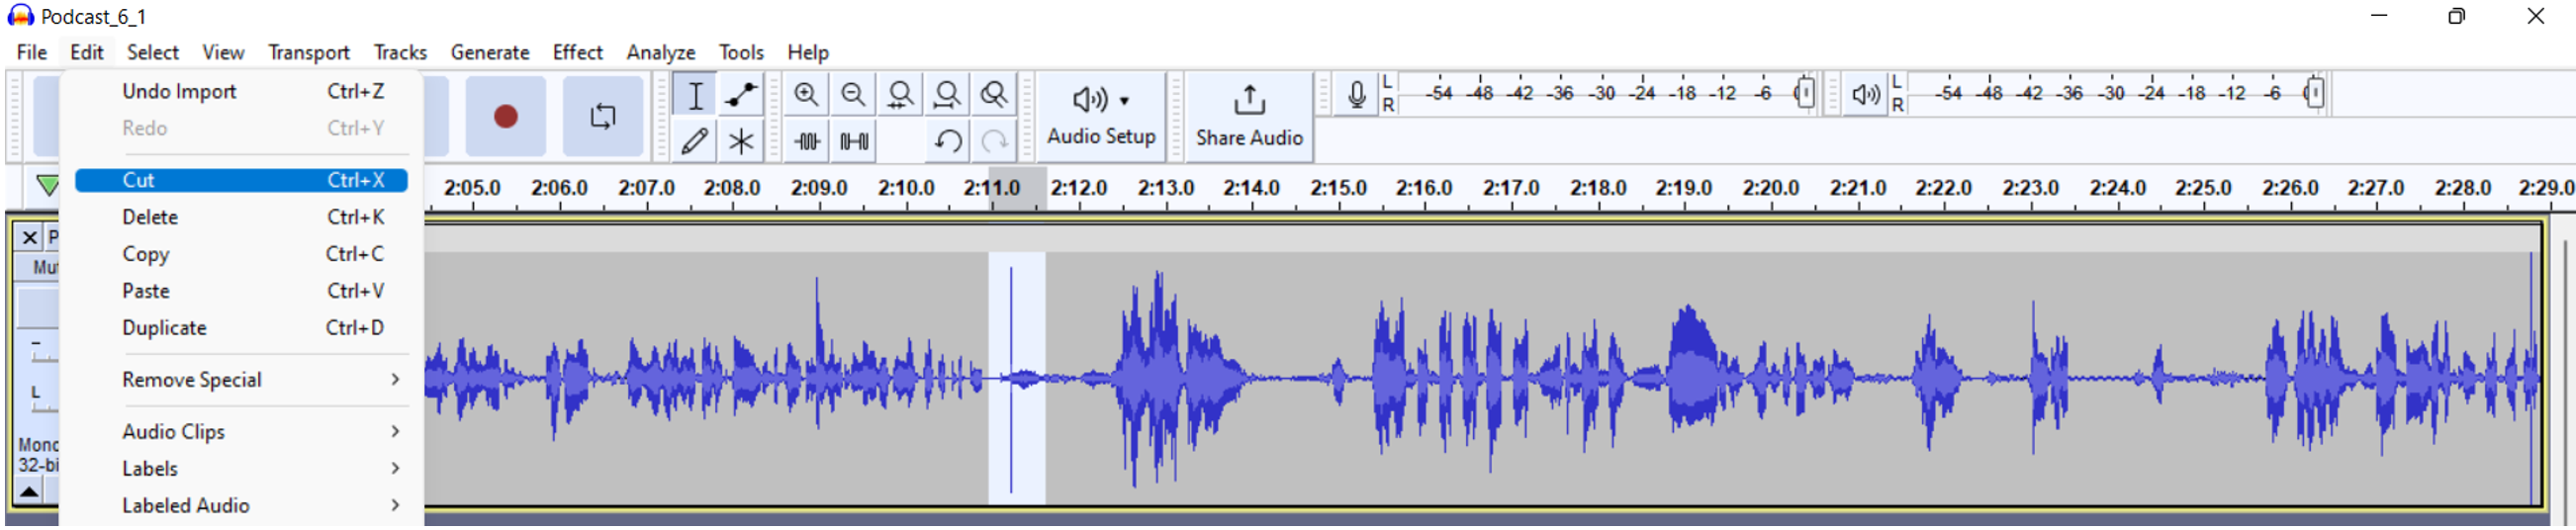
5. Cutting
1. Cutting is easiest before plosives (p, b, t, d) or within "constant" sounds (s, f, n, m).
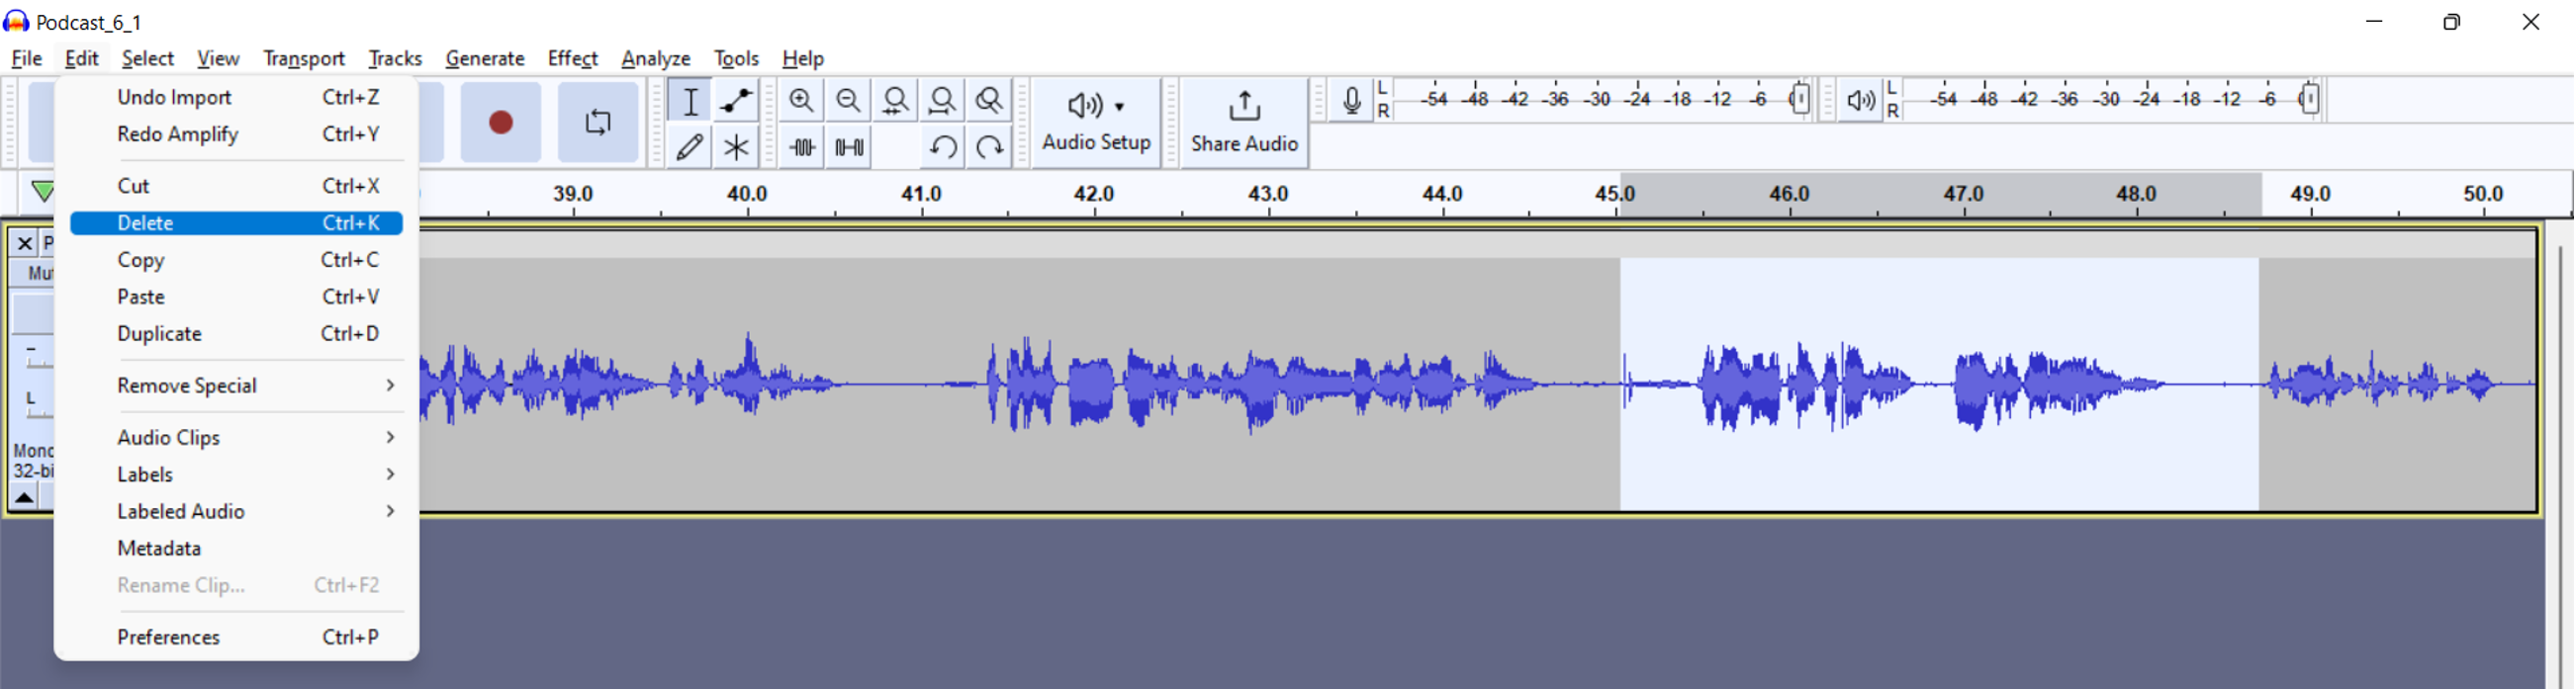
2. Mark both places (beginning and end of what you want to cut out) with mouse pressed,
Find Zero crossing (Z),
Edit -> Delete (Ctrl+K)
(if it does not fit or sounds weird: Edit -> Undo (Ctrl Z) and try again)
3. Cut as little as necessary. A cut should never be audible. Normalize again at the end.
4. At the end save your file: File -> Export -> Export as WAV (as wav-file)
5. In case of complicated cuts, text marks can be used to help. Select beginning of cut, set text mark with CTRL-B, select end of cut, CTRL-B, mark area between both cuts,
Find Zero crossing (Z),
Edit -> Delete
Delete text track (below) after cutting (press the “X” at the very left of the track).
6. Mixing and Saving
1. Open first sound: File -> Open, then select sound
2. Open more sounds: File -> Import -> Audio, then select sound. The sound will be added as a new track.
3. If you have too many tracks, drag interviews, moderation, music, sounds each to a track (possibly 2 tracks for interviews). You can drag a sound by mouse button held on the upper left corner of the sound and then move it with the mouse to another track.
4. Move the sounds to the right position as how they should be heard in the podcast.
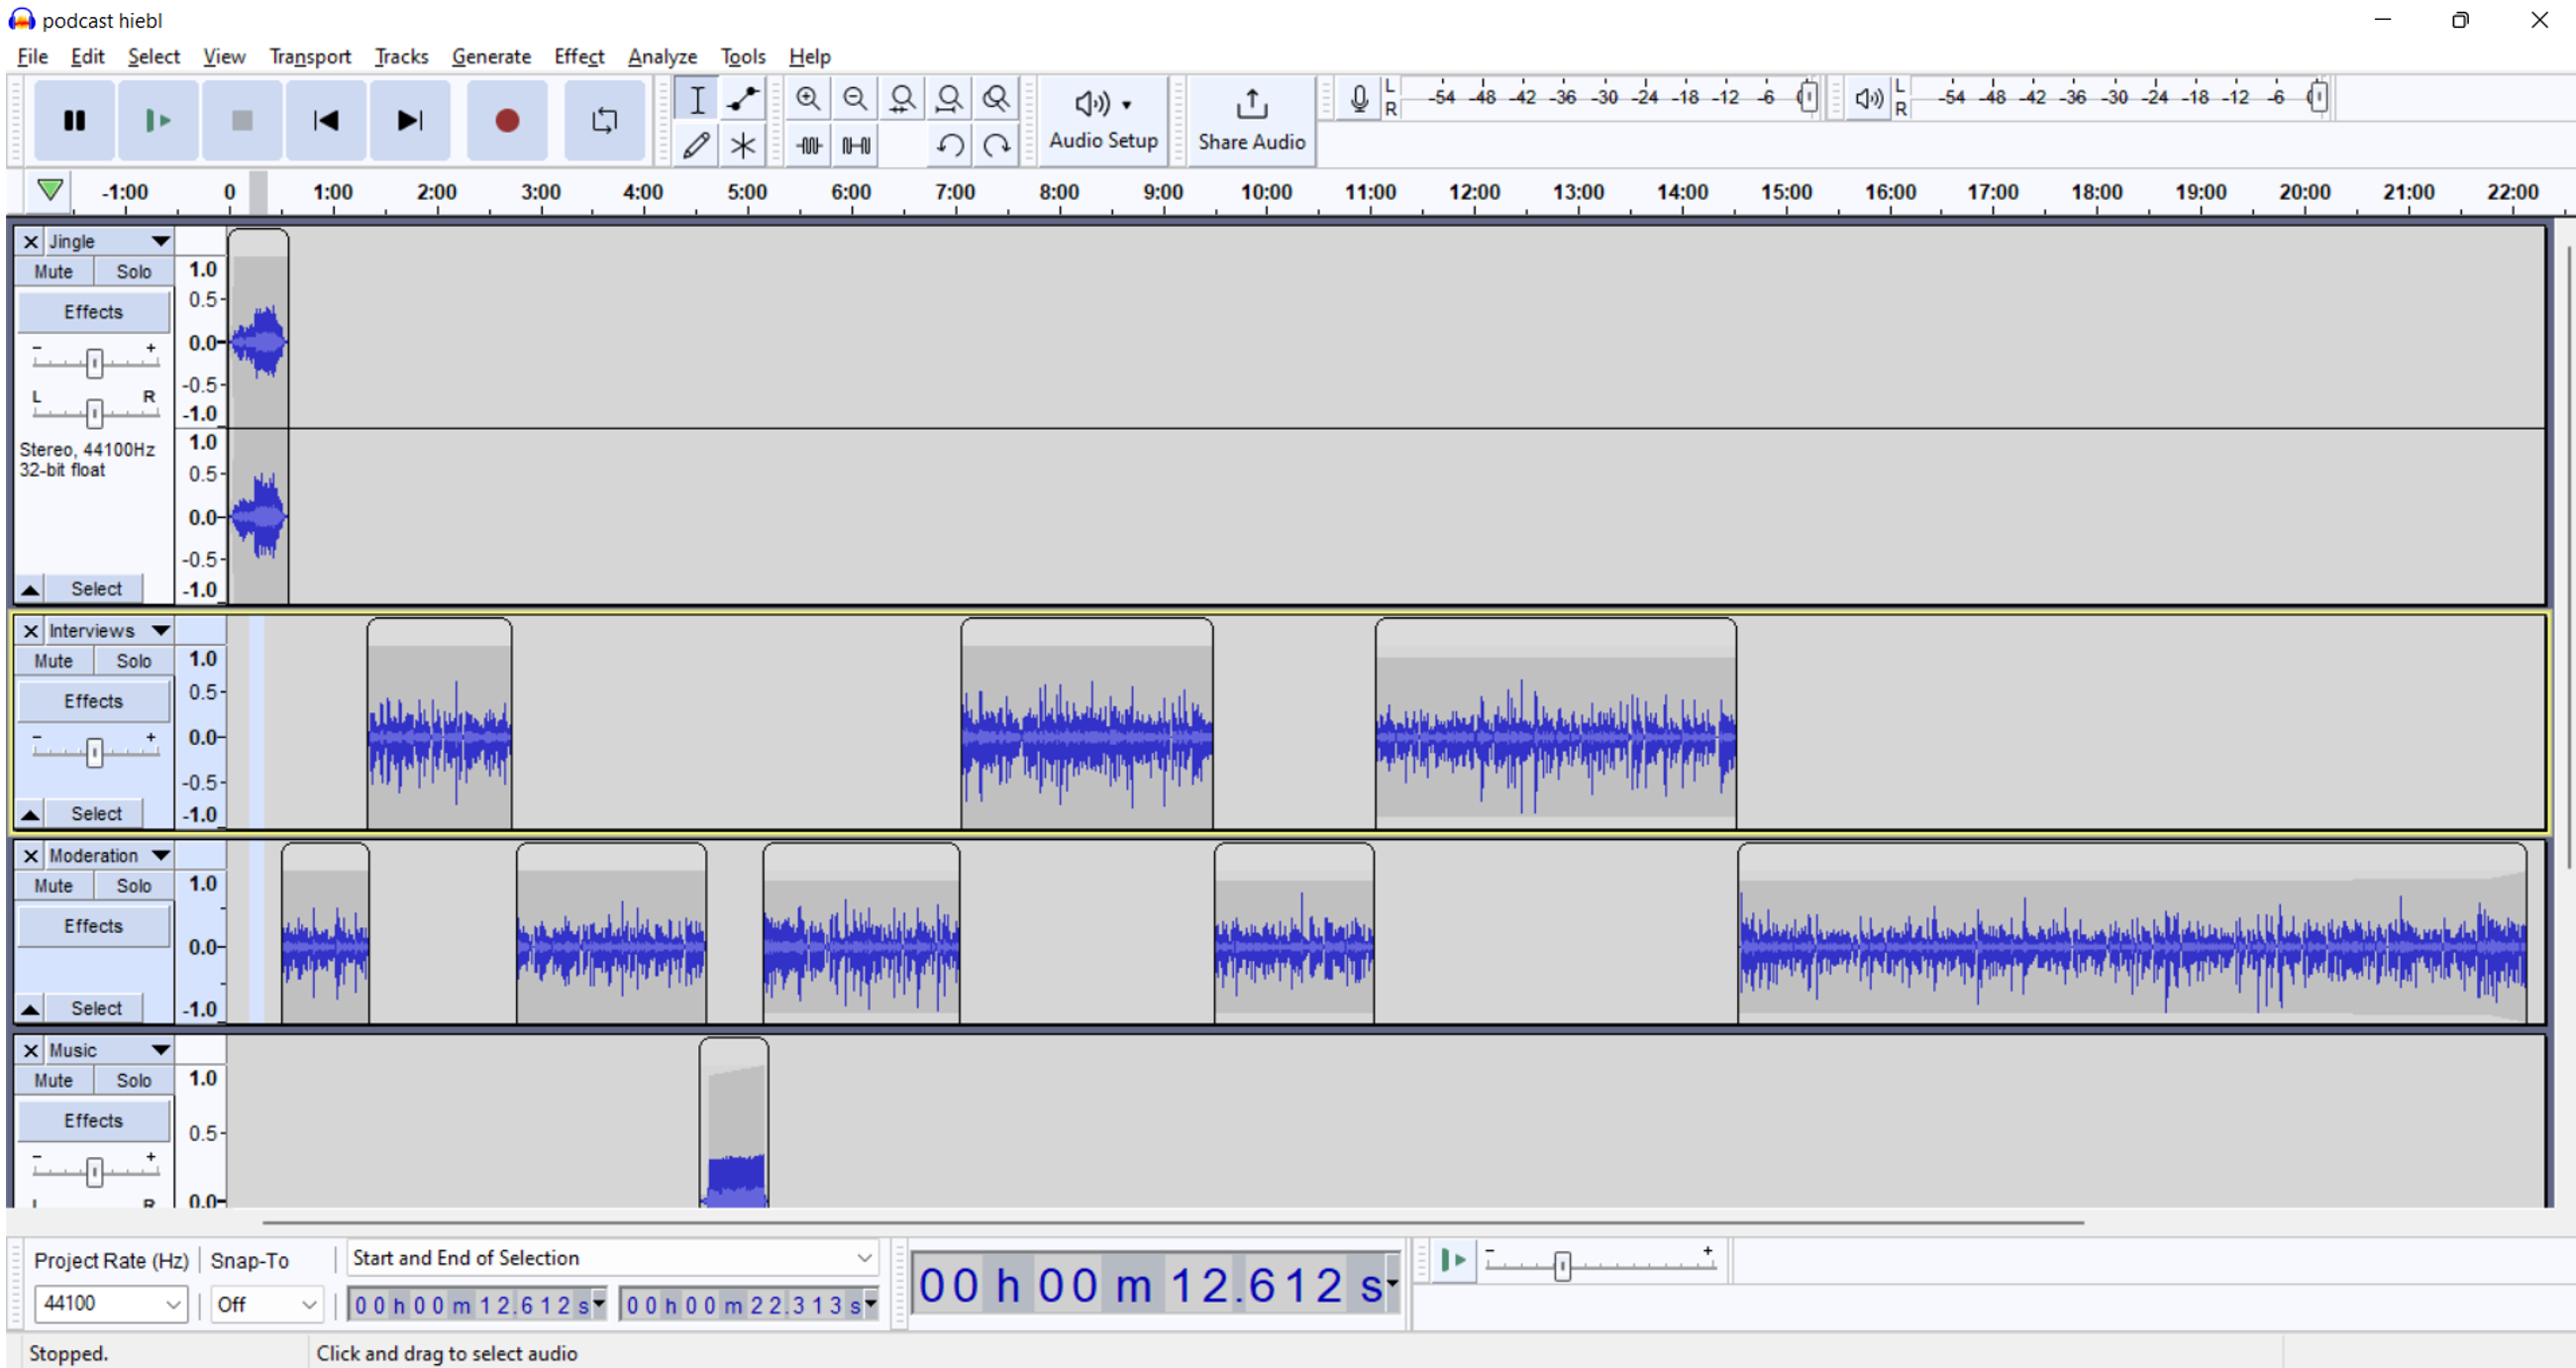
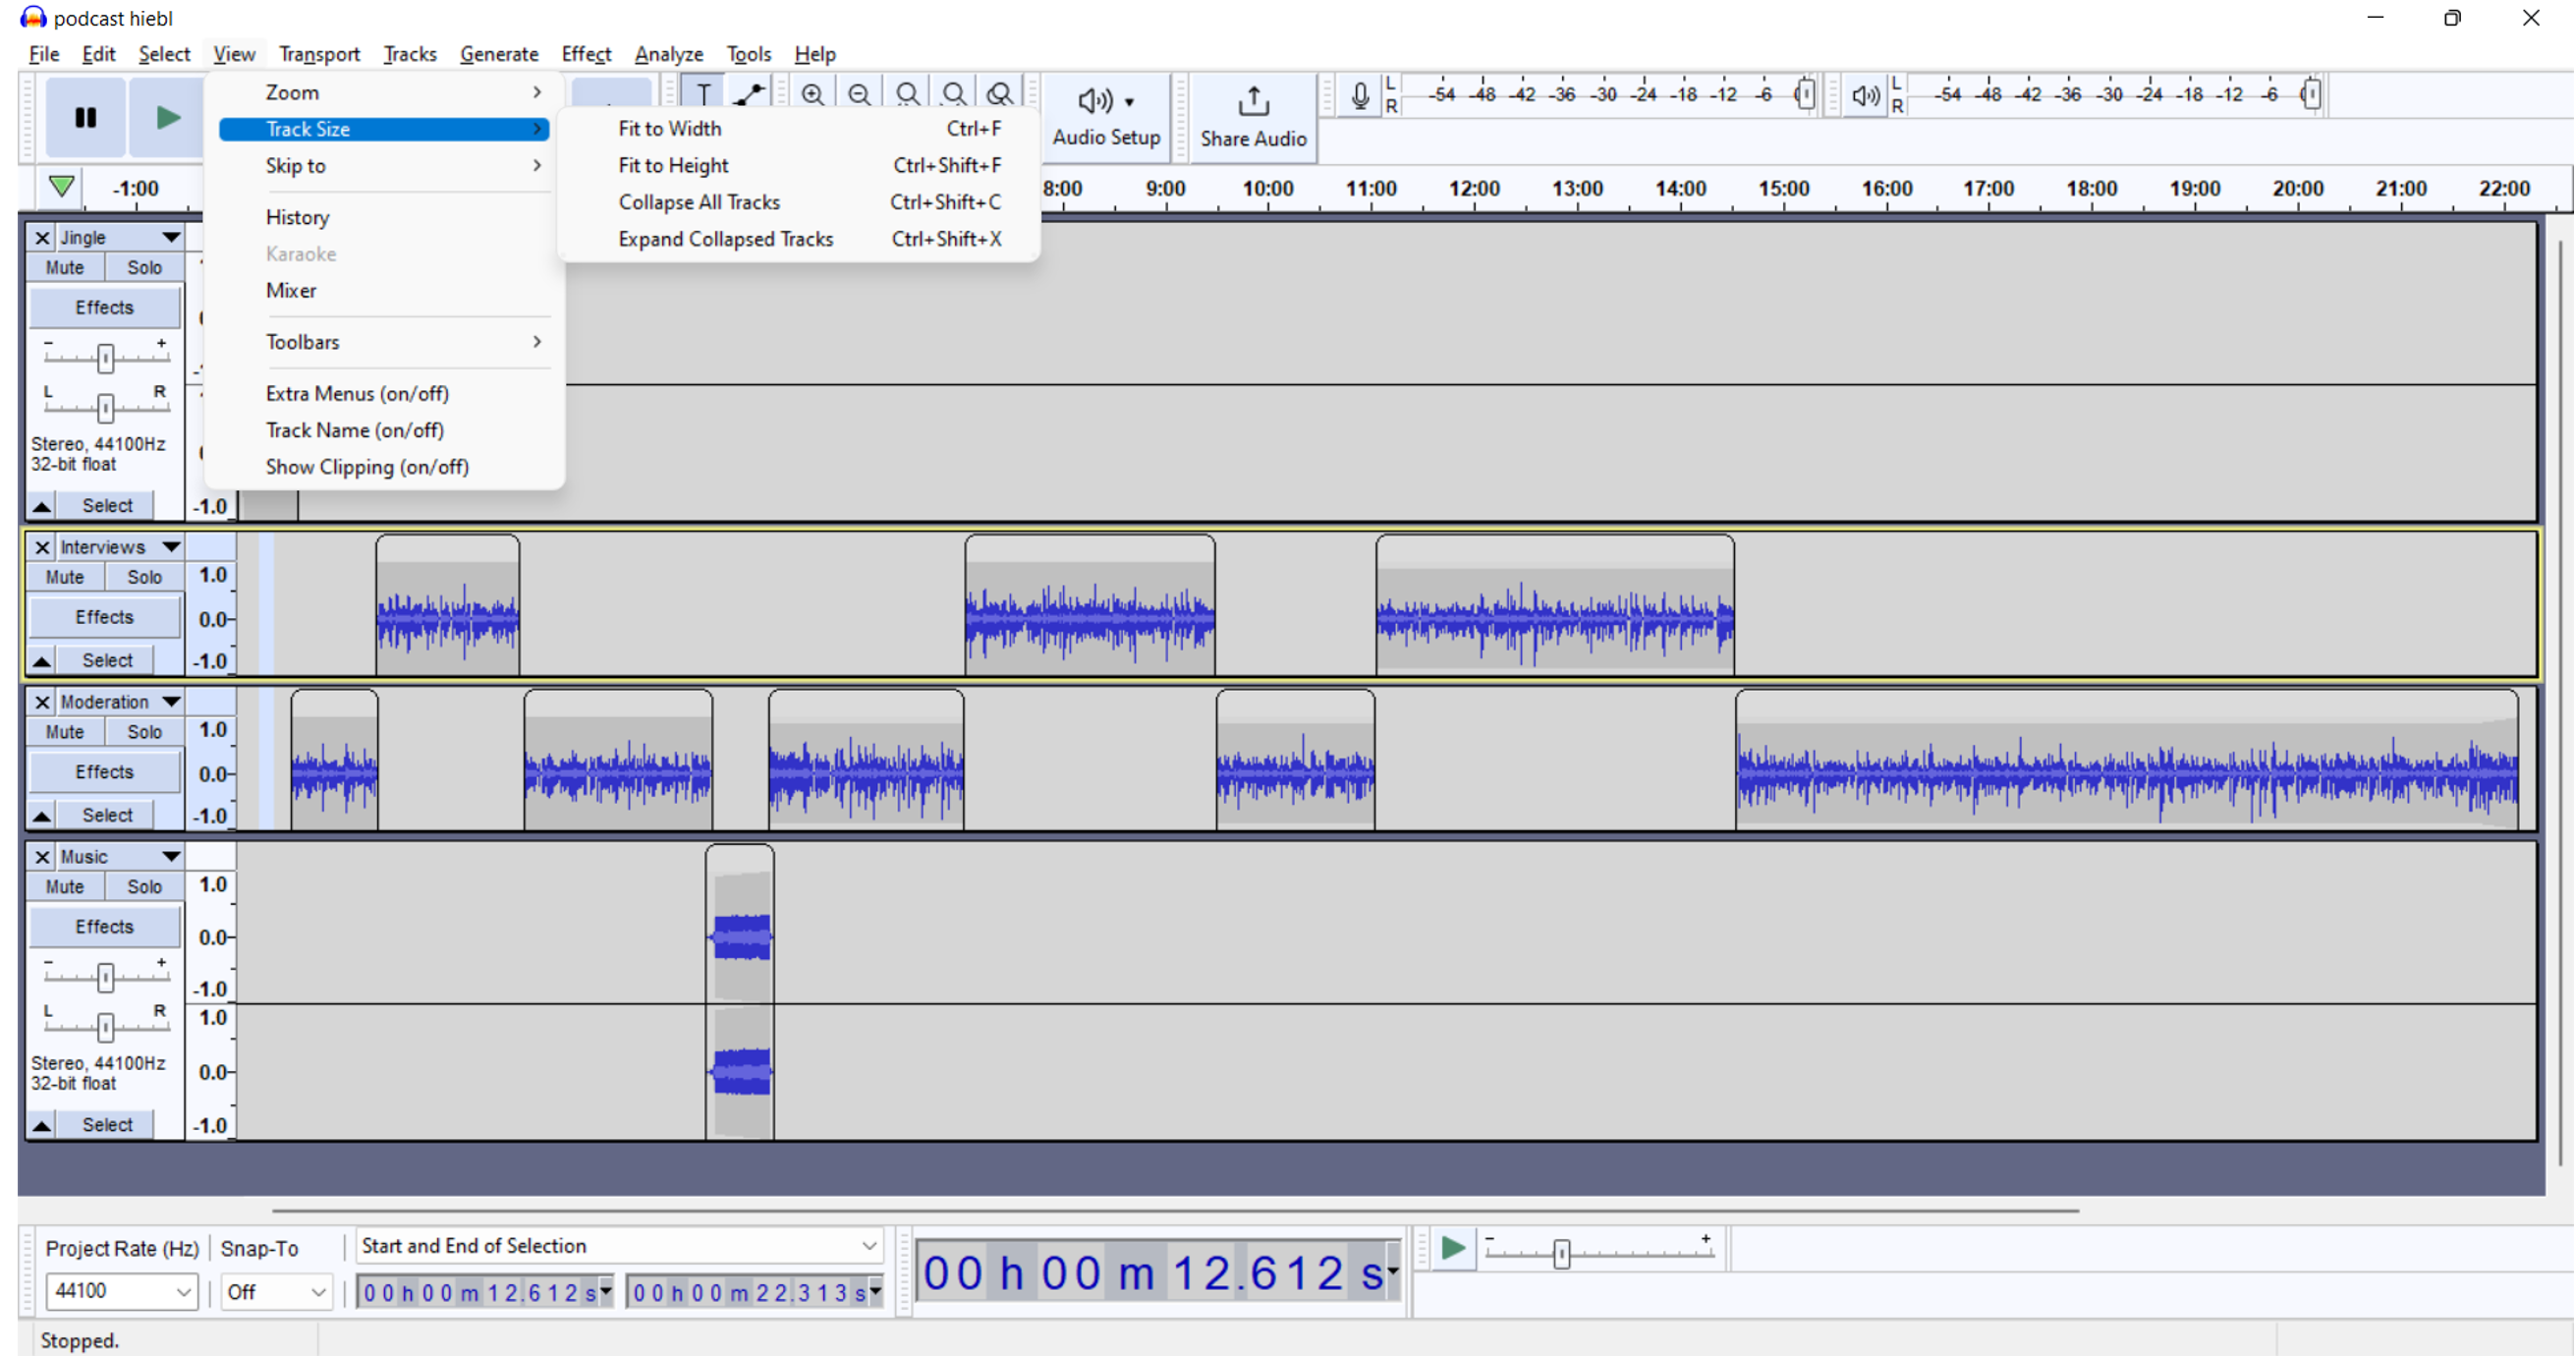
5. For clarity fit tracks into the window: View -> track size -> Fit to Height/Width
6. Adjust volume again with Normalize.
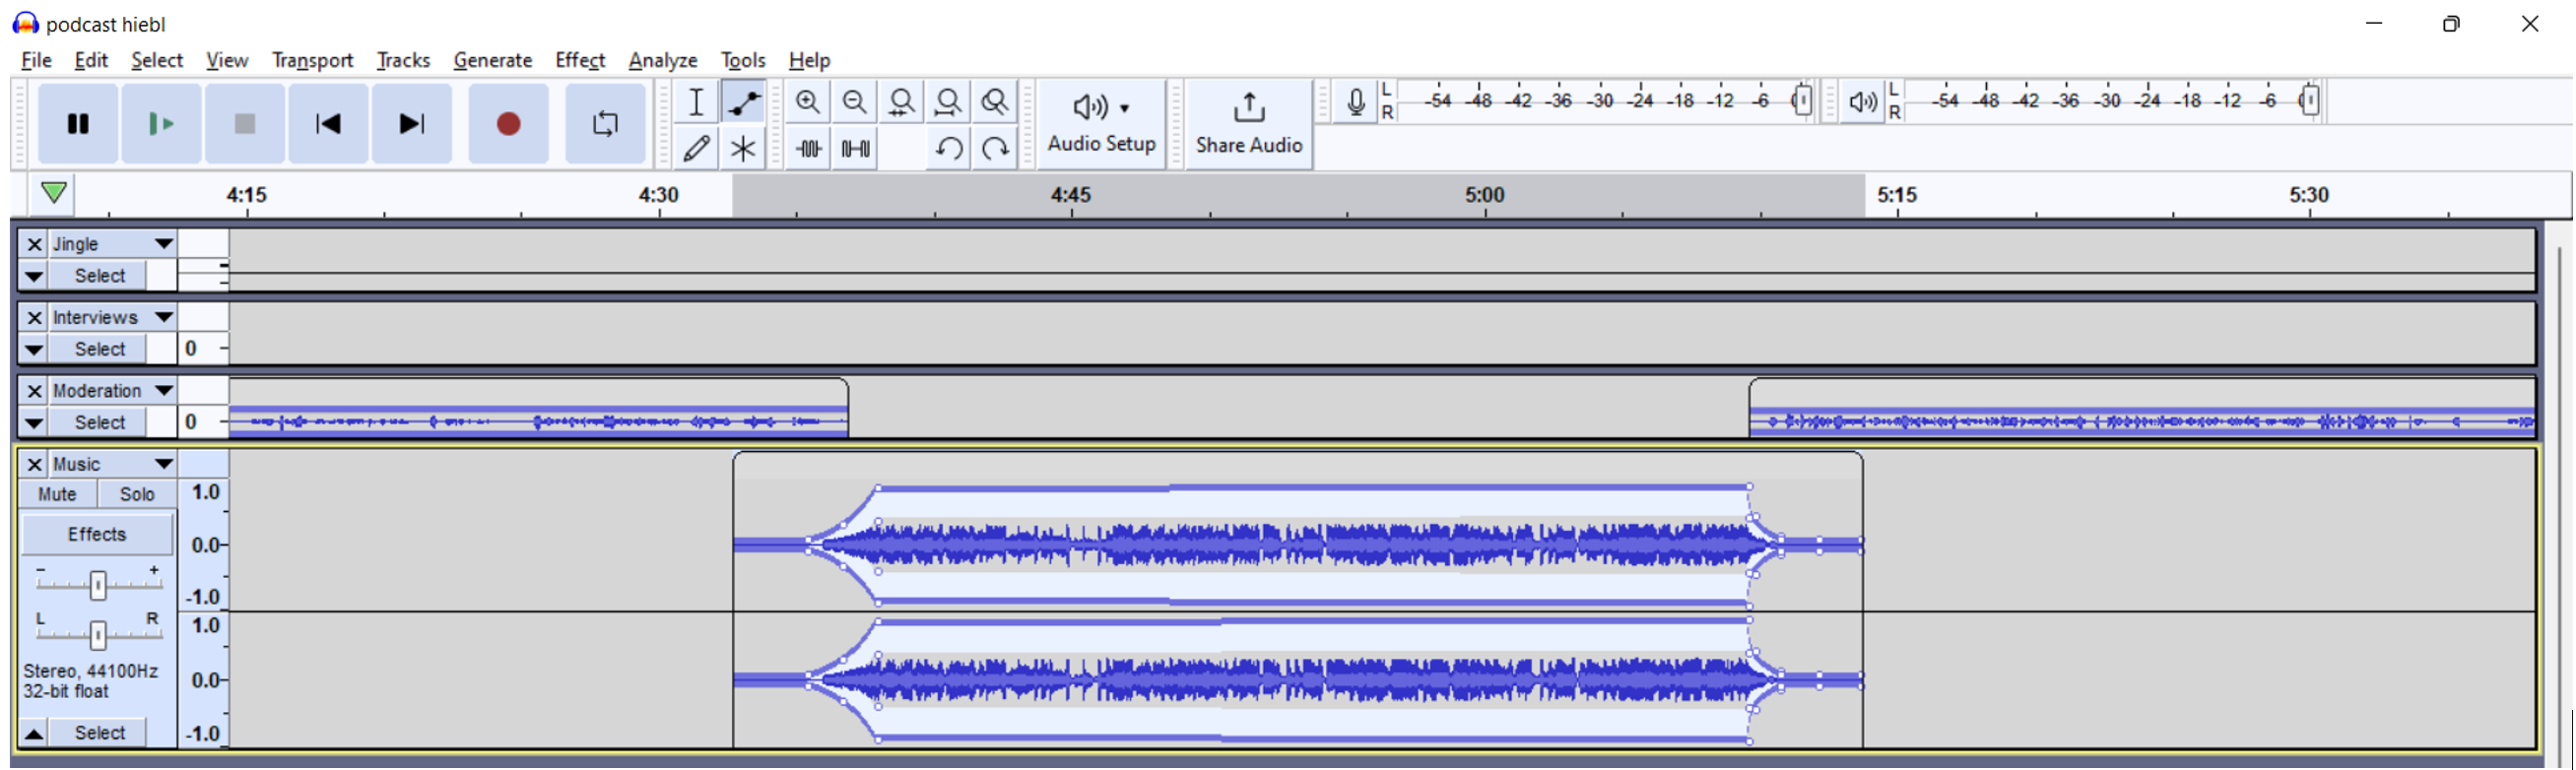
7. If you want to underlay music or noise, you can adjust the volume with the envelope tool: Klick on waveform, a new button appears and you can increase/decrease the volume.
8. If you are content with your work, save it as project (with later editing possibility): File -> Save Project -> Save Project (as), then choose name for file.
9. Save a finished (uncompressed) wav-file: File -> Export -> Export as WAV, then select name and file format, at the very end: Export as (compressed) MP3, choose name and bitrate.
For further and more detailed information see here:
Audacity 3.2 Beginners Tutorial on How to record and edit audio (Master Editor) (23:59)
https://www.youtube.com/watch?v=O1WzmigxZdM
Audacity: Complete Tutorial Guide to Audacity for Beginners (David Taylor)
https://www.youtube.com/watch?v=aCisC3sHneM
How To Use AUDACITY 2022 "Audacity Tutorial 2022"- COMPLETE GUIDE - Voice Over, Podcast, Music, ACX (VoiceOverMaster) (1:44:28)
https://www.youtube.com/watch?v=HVOdwrDu76A
Audacity Lessons 1-15 (TJ FREE) (Note: This Tutorial still works with a Audacity 2.x-Version)
https://www.youtube.com/watch?v=IXoGmyzNZOY&list=PLqazFFzUAPc7XJjOcH4iPDoIeFHA_eyKh&index=1 (Lesson 1)